Showing posts with label quilting. Show all posts

Sunday, September 04, 2016

Expanding the quilt

I decided that the green and blue jelly roll race quilt isn't quite big enough to be useful for the adult-sized people we have in this house, so I made some stars today.

Ribbon Star quilt block

This block is called a Ribbon Star.  I found it on YouTube, and it's so fun to make!  It's entirely made from 2.5" inch strips, so I opened another pack of the same fabrics that I used for the jelly roll section, plus some white strips left over from Emma's quilt top. 

Expanding the jelly roll race quilt top with ribbon star quilt blocks

I did up six stars today, three that spin to the right and three that spin to the left.  My initial plan was to put three on each end, alternating left and right as shown in this picture, with a wide white and colored sashing in between.

However, now that I have it laid out, I'm not sure about the alternating.  Maybe it would be better to have the top row all spin one way and the bottom row all spin the other?  And maybe also use four blocks in a row instead of three, with narrower sashing?

maybe four stars instead of three?

Any thoughts?

Friday, September 02, 2016

And again...

This is way too much fun.

Jelly roll quilt top #2.

This is two packages of precuts, 48 strips, and measures 60" x 63.5", unfinished.  It took approximately three hours, including pressing.  It's ready to go for backing and batting.

Not a bad way to spend an evening.

Tuesday, August 30, 2016

Suddenly... a quilt.

Well.  That was unexpected.

Emma and I went on our annual back-to-school thrift store jaunt to Tri-Cities this past weekend for school clothes, and (as always) found ourselves in the craft store as well.  I was just browsing around and for some reason ended up in the fabric section.  I had no particular plan in mind, but when I was confronted with a rack of packages of pre-cut quilt fabrics on a screaming deal sale, I was suddenly seized by a violent desire to make a quilt.  Immediately.

Emma picked out green and white.

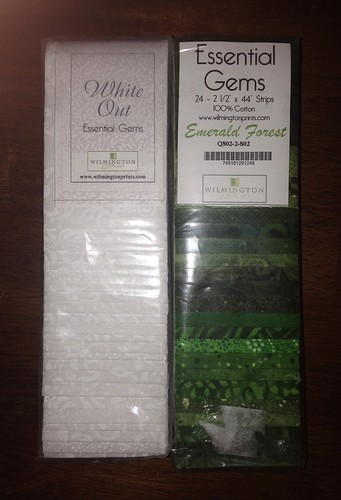
precuts for Emma's jelly roll race quilt (2 of each)

These packages are a highly convenient, if somewhat pricey, way to start a quilt.  Each package contains 24 strips measuring 2.5" x ~40".  Precut and ready to sew!  Getting them on sale was perfect, because normally each package is about $25 and that's too spendy for me.

I've never worked with these before, so I decided to keep it simple and just do a basic jelly roll race pattern.  A "jelly roll" is what the precut strips are called when 40 strips are packaged in a round wheel, and the jelly roll race quilt is a popular easy pattern using these pre-cuts. For Emma's quilt, I used a total of 96 strips (48 green, 48 white).  This will give a quilt top that's approximately 80" x 96" (queen sized), oversized for Emma's full-size bed but nice and snuggly.

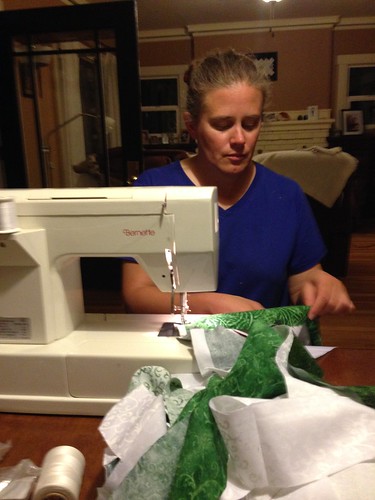
You start by sewing all the strips for each section together end to end, into a gigantic long strip.  I alternated green and white strips when I assembled the initial long strip for each section.

sewing the strips together for Emma's jelly roll race quilt

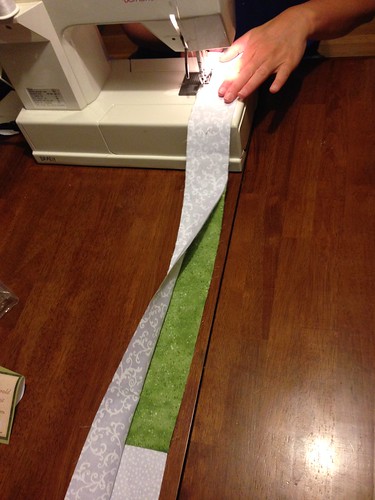
Once the strips for each section are attached, you whack off 18" from one end so that the seams don't line up when you fold it in half, then match up the two ends and sew a long seam down one edge, thereby halving the length and doubling the width.  This first seam is very, very, very, very long. You end up with a piece that is two strips wide.

first doubling of Emma's jelly roll race quilt

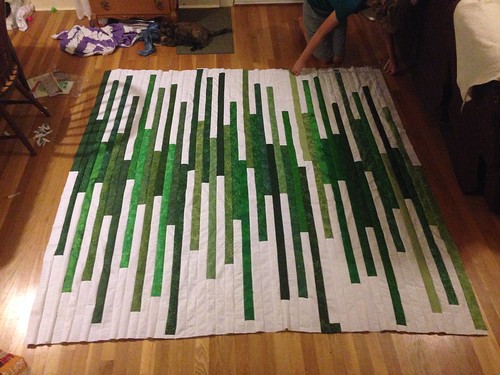
Then you fold and sew the long edge again four more times, until you have a piece that is 32 strips wide.  Because of geometry and the laws of doubling, Emma's quilt had to be made in two pieces, with the second one half the size of the first (16 strips wide).  So I made the two pieces, sewed them to each other, and hey presto- a quilt top!

Emma's jelly roll race quilt

How fun is that?! I actually like the randomness that happens with the folding and doubling, though that one spot where the green breaks is a little jarring to me.  Emma says she likes that spot best- it's the path through the hedge.  Go figure.  There's really no good way to predict or arrange the colors without making yourself crazy; you have to let go and embrace the serendipity.

This was a really easy project that only took an evening and a half.  I can't wait to finish it off with the backing and batting, so I can make MY quilt.  Because... ahem... of course I couldn't stop at just one when the fabric was on sale...

Saturday, December 29, 2007

One of Emma's Christmas presents was a little doll cradle I found at a garage sale, that came with just a foam mattress. All dolls, of course, also need a pillow and a blanket, but a headcold and work prevented me from making those before Christmas. So I made the pillow on Christmas day, and the 26th, I made a little quilt.


This was sort of a bittersweet project. Dad was here for Christmas, and he brought me boxes and boxes and boxes, containing Mom's fabric and craft stash. When Emma and I were in Maine last March, I spent several days sorting fabric and sewing supplies and scrapbooking stash, deciding what I wanted to keep. Basically, I cleaned out her craft room for him. It was hard enough for me to do this, but Dad had trouble even being in the room.

When I was in Maine in August 2004, the summer before Mom died, we started planning a quilt for Emma that we would make together the following summer. That quilt was never made, but when I was cleaning her craft room this year, I found the stack of fabric that we had tentatively pulled together as an idea for the quilt. Purples, blues, and greens were the colors, but we never got as far as deciding on a block pattern.

Back to the present. Emma chose all the fabrics for her doll quilt herself (with supervision), from one of the boxes I brought in for her to rummage through. Three of the fabrics that she chose were from that stack of fabric for the quilt-that-never-was. I'd like to think that Mom would approve.

Saturday, September 03, 2005

It’s done!!


But I feel like an idiot. Remember when I said a couple days ago that my sewing machine was so bare-bones that I couldn’t do free motion quilting or even lower the feed dogs? Well, I was rummaging through the accessory box that came with the machine, looking for a different presser foot that wouldn’t grab the fabric so much, and I found this:


This is a darning foot. I registered this fact, then had to do a double take. Why would the manufacturer have included this foot with my machine, when you have to be able to lower the feed dogs in order to use it? I pulled out the manual, and sure enough, there on page 19, it shows how to lower the feed dogs.

I looked in the manual years ago, to see how to lower the feed dogs. I just KNOW I did. I’m POSITIVE. But obviously I’m wrong. Either I read these directions and forgot them, or missed that page of the manual, or something. I’ve had this machine for ten years, used it quite a bit, and I didn’t even know I could lower the feed dogs. Pitiful.

So anyway, I put the darning foot on and played with free motion quilting a bit. It’s hard! I drew a simple rope-type border on the quilt, and just went for it. It OK, though it would have been easier if the machine was flush with the table top, since there wasn’t much room for my hands to hold the fabric.


I probably could have quilted these lines using a regular foot and the feed dogs, but it was good practice to do it without. Wiggly lines and all, I like the way it came out. And I like the way the quilt as a whole came out.


Emma likes it too. I had just barely finished taking pictures of the spread-out quilt, when she grabbed it and started hugging it. She held onto it all through Sesame Street,


and dragged it behind her down the hall when she went for her nap, insisting on having it in the crib with her even though it’s a pretty warm day.

Monday, August 29, 2005

Still here, still chugging along.... I've been really busy with Emma and work, the past week, but I have still managed to do some fibery things. I started another doily (I know, I know. WHY do I need all these doilies?) during the fair week, and haven't done much on it since. I did get another two rounds done over the weekend.


It's this one, from Christine's wonderful site full of vintage patterns. I love this site. Most of the doilies I've made in recent years have come from it. I'm making this doily out of #30 Cebelia crochet cotton, with a #12 hook. That's pretty much my default thread.

On Friday, Emma and I made the trek all the way down to Puyallup, to enter two thing in the BIG Fair!


The sewing thread doily and a hardanger doily I made last summer. This was in the county fair last year, but the Puyallup Fair lets you enter things that were made within the past two years, not just one like the San Juan County Fair.

It was a fun day out, but a lot of driving. Puyallup is a bit farther away than I thought. Actually, it wouldn't have been at all bad, if the traffic had been reasonable. Getting there wasn't too awful, it only took a little over two hours, but going back north on I-5 was horrendous. The stretch through Everett (maybe 15 miles), which is always slow and congested for no apparent reason, took us an hour and a half! I was actually starting to wonder if we'd have time to stop at Jo-Ann's before we made a dash for the ferry.

We did have time, and good thing too. I had a 40% off coupon, and got the batting and backing fabric for my Ohio Star quilt. The fabric was on sale, and with the coupon, they practically had to pay me! I sewed together the backing, pin basted the layers together, and quilted three of the stars on Saturday. Yesterday, I finished quilting the rest of the stars. Now all that's left is to run some quilting lines in the sashing and borders, trim the edges even, and finish the edges.


I must say that I immediately understood the appeal of long-arm quilting machines after quilting just one of these stars. My sewing machine is a very bare-bones model, not made with quilters in mind. I can't even drop the feed dogs, so free-motion quilting is not an option. All my stitching is of the straight-ahead-only variety, though I can manually hold a button down and go in reverse. Every time I want to change direction, I have to stop, lift the presser foot, rotate the fabric (pulling the WHOLE QUILT through the (very small) arm of the machine), drop the presser foot, and continue stitching. What.A.Pain.

Actually, it wasn't so bad. By the time I'd done three or four stars, I'd gotten into a rhythm. I could do a row of three stars in an hour. I like the way it's looking. The quilting lines really make the pattern pop. Kind of like how the final backstitching makes a counted cross stitch piece come to life. I was going to hand quilt this, but I decided that since the piecing on the top is a little wonky and beginner-looking, I'd machine quilt this one, and hand-quilt the next one, paying much more attention to matching points perfectly while I'm piecing it.

I think Emma can't wait for it to be done. I spread it out on my bed yesterday to get a look at the quilting, and she immediately got under the edge, crawled up onto the bed under the quilt, and crawled under it all the way to my pillow. She poked her head out, said "Emma ny-ny, Mama," put her head down, and pulled the quilt up around her shoulders. It's so nice to have your work appreciated, even if it's not perfect.

Thursday, August 04, 2005

Whee! Quilting is fun! I finished the Ohio Star quilt top last night! I can't believe the piecing is done already!
  • Monday night- put together one complete block.
  • Tuesday- cut out the pieces for the rest of the blocks and pieced together all the triangle units.
  • Wednesday- finished piecing the 12" blocks, cut out the sashing and border pieces, and stitched everything together.

I really like the way the fabrics work together in this. They just look happy. You can't really tell from the picture, but both the yellow and the white fabrics are prints, not solids. The yellow has a tiny floral pattern of dark gold on yellow, and the white has a white-on-white print of small leaves. And then of course, there's the ladybug fabric that always makes me smile. Emma loves it, and wanted to "go ny-ny" with it last night. She was very upset when I told her it wasn't done and she couldn't sleep under it yet.

After I finished the quilt top, I was still in a fibery mood, so I started some little hardanger sachets to sell at the fair. These will get sewn into stuffed ornaments similar to the one I showed here, but with lavender inside. Each one takes about 2.5 hours to stitch, so it's about the same time to make one of these as one of the crocheted sachets, maybe a little longer.

The one on the left is finished, and the one on the right has the cutwork done and the threads removed, but still needs the needleweaving and dove's eyes. I thought it was neat to show the stages of hardanger.

Wednesday, August 03, 2005

Shaun has been in Germany the past week for a scientific meeting, the lucky duck, and so it's just been me and Emma holding down the fort. While I would have liked to go with him and see a bit of Germany, our finances said no. So I stayed home and have been fibering up a storm. Unfortunately, Shaun took the camera with him, so I've been severely impaired in my blogging ability. I finally couldn't stand it yesterday, and borrowed a camera from the lab so I could show what I've been doing.

In a screeching change of direction, I decided not to make the crocheted runner after all. I had finished eight of the motifs, and as I was looking at them stacked on my side table, I said, "Hmm, you could run a ribbon through those eyelets. And I've got all that dried lavender. I think I have some tulle somewhere. Those would make really cute sachets. Do I really need a table runner?"


All I did was sew a round pouch of purple tulle, fill it with lavender, and enclose it in the motifs by weaving a ribbon through the holes around the edges of two motifs. Tie a bow, loop a hanger, and voila! Pretty sachets. I'm going to sell these at the Fair. (Well, I'll keep one for myself and to enter for judging!)

I also finished up a framed hardanger piece. I got the frame while I was off-island, because apparently it is hard to find a ready-made frame with a 6" square opening. This one is one of the put-it-together-yourself kind from Michaels. This was my first experience with lacing a piece of needlework around foamcore, and I think it came out great. I actually had to lace it twice; once for the dark green lining fabric and once for the hardanger. Lacing the lining was good practice, though next time I frame a piece of hardanger, I'll use a different color thread for lacing the lining, as it was hard to tell which threads I needed to tighten when I was lacing the hardanger.


Then on Monday night, a fit of something (I'm not sure what) came over me and I made this:


My very first quilt block ever! It's the Ohio Star pattern, and while I know that it's not perfect and the points don't all match up exactly, I'm ridiculously excited about it. I made this one block from start to finish to be sure I liked the pattern, then spent two hours yesterday cutting out the pieces for all the rest of the blocks.


There will be twelve of these 12" blocks, in three rows of four, separated and framed by a yellow lattice and the whole thing framed by a wide border of the ladybug fabric. This will fit a twin/double bed and is for Emma. She spent the whole time I was cutting fabric folding and refolding a scrap, carrying it around, and wrapping her dolly in it, all the while pointing and giggling at the ladybugs.

I did have a passing thought at how strange it is to cut up perfectly good fabric into little pieces and then sew it all back together again....