
In addition to the "Have-To" tasks this weekend, I also found myself taking on a lengthy, involved, fun project. I repaired, cleaned and oiled my Schacht spinning wheel.
I had intended to do the cleaning and oiling in the spring when the weather warmed up, but when I sat down to spin on Friday night, I couldn't take the clunking anymore. This is a result of the worn rear bearing that carries the drive wheel axle. The piece that carries the bearing is held in place by two screws on the walnut insert in the back legs. On my wheel, the bearing itself was corroded and didn't allow the crank to rotate freely. In addition, the lower of the two screws had stripped its hole in the wood, and the piece with the bearing wobbled, causing the drive wheel to wobble. For the past couple years (years? has it really been years?), I've had a jury-rigged fix with a piece of packing tape- not ideal.
I've actually had the replacement part for three years, bought when I replaced the tension knob. I knew the bearing also needed to be replaced, and I knew exactly how I wanted to do it, but there was one problem. I couldn't get the pin out of the drive wheel so that I could get the crank out of the hub and the bearing off the crank.
Then on Friday, I was finally fed up with the wheel bossing me around and resisting this very much needed upgrade. I got serious with it and gave the pin several good whacks, and finally, TA-DA!
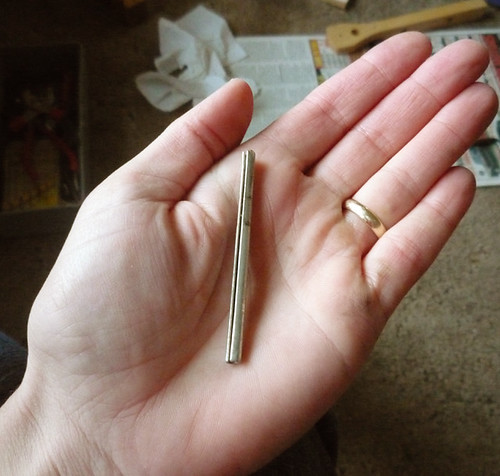
The pin is out! Spring pins are a pain in the neck. Sturdy: yes. Tight-fitting: oh my goodness yes. Easy to remove: NO.
So here are the old parts and the new parts. The walnut original is on the left, the maple replacement is on the right.

The problem is that I won't give up the walnut insert in the rear legs of my wheel. I think that's a key piece that gives the older Schacht Matchless wheels their beauty. So even though the Schacht people recommended using the maple piece instead of the potentially brittle walnut piece, I took the new maple bearing piece and attached it to the old walnut insert. My walnut piece isn't cracked, and I modified it by drilling the upper hole all the way through the piece instead of leaving it only halfway. This way I can use a bolt and a nut to hold the piece in alignment, rather than relying on the strength of the wood itself to hold a screw in place.
Drilling into my spinning wheel = EEK! But it worked and the piece is now held solidly.
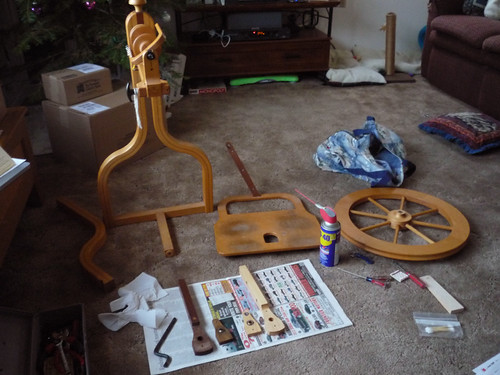
In the process of getting the crank out of the hub, I had to partially disassemble the wheel. Note, please, the extremely dirty treadle.
Once the bearing had been replaced, I was going to just put it back together and SPIN! but then I looked at the wheel and was suddenly aware of how very dirty my wheel is. I spun outdoors at almost every Farmer's Market this summer and fall, and it took its toll. The contrast with Emma's lovely wheel was obvious, and I didn't want my wheel to feel neglected and sad when I bring in Emma's wheel to put in front of the Christmas tree after she's asleep on Christmas eve.
Since the wheel was already mostly disassembled, I decided to go ahead and completely deconstruct it.

There really aren't that many parts to a spinning wheel. And the hardware inventory isn't that bad, either.
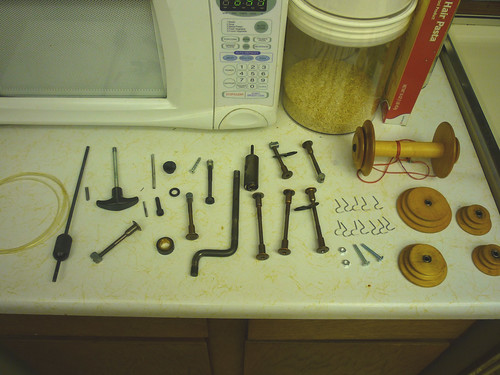
So everything got scrubbed, and the treadle got sanded. The rest of the parts didn't need sanding, just a wash. I gave all the parts a coat of oil, then put it all back together, discovering along the way that spring pins are as much of a pain to put back in as they are to take out. I ended up having to drill a chamfer onto the hole through the crank that the pin fits into, as a guide for starting the pin, since I couldn't get the pin seated when the crank was in the hub.
Again, drilling my wheel = EEK! But it worked and the pin finally went in.
Since the treadle had been sanded, it needed a lot more oil than the rest. After I reconstructed the wheel, I gave everything one more coat, then just kept applying oil to the treadle as needed for the next six hours. Whenever one coat absorbed, I applied another. It was at least a dozen coats. As with the Ashford, when the last coat was still glisteny after an hour I called it good, buffed it out, and let it dry.
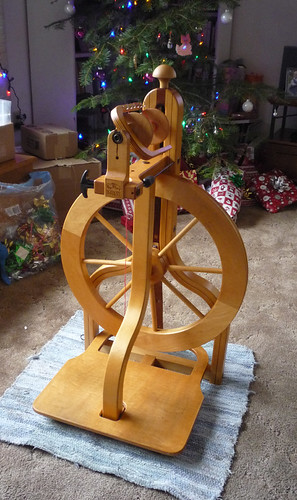
So now my wheel can proudly sit next to the tree on Christmas morning with the Ashford. I do love a freshly cleaned wheel. I spun for several hours today, making merino singles that will ply to a very light laceweight.
Note, please, the vast difference in the look of the treadle. Ahhh, much better.
To close, I absolutely have to show you this. Emma wrote this note to me while I was applying the last few coats of oil to the treadle.

Ha! Little does she know what's in store for next Sunday!
3 comments:
You have extreme patience for totally disassembling your wheel for cleaning. It looks marvelous and probably feels like a new wheel to you now. Well done!
And I got happy little chills reading Emma's note - she's going to be so excited!
You are a much braver woman than I.... disassembling your wheel like that AND drilling on it!!!! Clearly you need to be with me when I attempt to do the same to my Ashford! LOVE Emma's note. I wish I could be a fly on the wall when she sees it Christmas morning.....
Both wheels look lovely! I can't wait until I get my wheel out of storage in a few months ... No doubt it will need a good service too :-)
Post a Comment