How does that happen? Granted, this year was more chaotic than normal because of moving, but still... I do remember Thanksgiving, but most of the past month and a half is a complete blur. I seriously feel like there's a couple weeks that went missing somewhere in there.

Monday, December 22, 2014
I'm convinced that there is some sort of time-sucking vortex that happens every year in November and December. Suddenly here we are three days from Christmas, my dad arrives this afternoon for a week's visit, I haven't cleaned the bathroom yet, and my box of presents somehow never got mailed to Philadelphia.
Saturday, December 13, 2014
Can I please just say...
New mattress.
Memory foam.
Awesome sleep.
Should have done it ages ago.
The difference in the restfulness of my sleep is unbelievable. My back doesn't hurt. My hands don't go numb from sleeping on my side. It is SO AMAZINGLY AWESOME!
I didn't really realize just how uncomfortable my old mattress was until I got the new one.
Because I am thoroughly a geek, I even have Visual Displays and Science(ish) Data to back this up. I have a dynamic alarm clock app on my phone, which uses the phone's accelerometer to monitor my movements and wake me up when I'm in a light sleep phase during the half-hour period before the set alarm time. I've tested it with the new mattress, because I thought maybe the foam would prevent it from picking up my movements as well, but it still catches the slightest shift.
Here are a few graphs of my sleep pattern on the old mattress. I picked out some of the better ones - these are nights in late November, after I moved into the new house, when I felt like I got a good night's sleep.


Note that the peaks and valleys are extreme, I completely woke up multiple times a night, and rarely went fully into what the app considers "Deep Sleep". This tells me I was very restless.
Now here's one on the new mattress:

Granted, this was a Friday night, so I slept about an hour longer than on a weekday. Even so...smaller peaks, deeper sleep, and I only completely woke up once.
My "sleep quality" score, which is a combination of length of time in bed and amount of movement (using some mysterious formula), has been consistently 95-100% since getting the new mattress. On the old mattress I considered anything above 85% a triumph, and the average was in the low 70s.
I know this isn't very scientific, but it's pretty cool and there's a definite visual difference in the graphs starting when I got the new mattress. More importantly, I can tell the difference in how I feel in the morning and function during the day.
New mattress.
Memory foam.
Awesome sleep.
Should have done it ages ago.
The difference in the restfulness of my sleep is unbelievable. My back doesn't hurt. My hands don't go numb from sleeping on my side. It is SO AMAZINGLY AWESOME!
I didn't really realize just how uncomfortable my old mattress was until I got the new one.
Because I am thoroughly a geek, I even have Visual Displays and Science(ish) Data to back this up. I have a dynamic alarm clock app on my phone, which uses the phone's accelerometer to monitor my movements and wake me up when I'm in a light sleep phase during the half-hour period before the set alarm time. I've tested it with the new mattress, because I thought maybe the foam would prevent it from picking up my movements as well, but it still catches the slightest shift.
Here are a few graphs of my sleep pattern on the old mattress. I picked out some of the better ones - these are nights in late November, after I moved into the new house, when I felt like I got a good night's sleep.
Note that the peaks and valleys are extreme, I completely woke up multiple times a night, and rarely went fully into what the app considers "Deep Sleep". This tells me I was very restless.
Now here's one on the new mattress:
Granted, this was a Friday night, so I slept about an hour longer than on a weekday. Even so...smaller peaks, deeper sleep, and I only completely woke up once.
My "sleep quality" score, which is a combination of length of time in bed and amount of movement (using some mysterious formula), has been consistently 95-100% since getting the new mattress. On the old mattress I considered anything above 85% a triumph, and the average was in the low 70s.
I know this isn't very scientific, but it's pretty cool and there's a definite visual difference in the graphs starting when I got the new mattress. More importantly, I can tell the difference in how I feel in the morning and function during the day.
Friday, December 05, 2014
I have done so many new things over the past month or so, things I have never EVER done before:
I'm not going to kid you, it was a breathtakingly expensive month. My bank account is leaner, but my heart is very full.
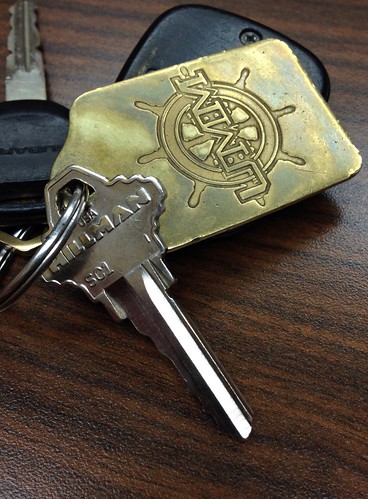
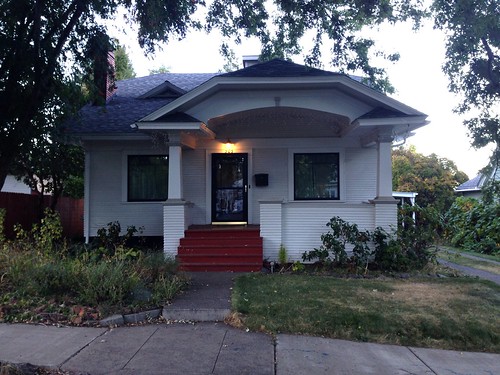
- I purchased my very own house. It is my house and I own it and it is mine (and the bank's).
- I made my first solo mortgage payment. One down, 359 to go.
- I used a post hole digger and installed a mailbox.
- I installed a clothes rod in a closet.
- I used a high-pressure hose attachment to clean out a slow-draining laundry sink.
- I hung pictures from a picture rail.
- I changed the water filter in a refrigerator.
- I reversed the direction on a light switch so that up is on and down is off.
- I read up on how to prune grape vines.
- I purchased a wheelbarrow.
- I purchased a ladder.
- I purchased a clothes dryer.
- I reversed the door on a clothes dryer, so it opens the right way in relation to the adjacent washing machine.
- I purchased a new mattress for Emma, to fit her full-size-bed alcove.
- I purchased a new mattress for myself, to replace the lumpy, cheap, 19-year-old one that my ex-husband bought when he was a grad student. Slept better than I have in YEARS.
- I finished purchasing a high quality musical instrument, by making a lump-sum payment for the outstanding balance so as to avoid the interest and so it wouldn't drag out over the next two years.
- I listened in wonder as Emma joyfully and confidently progressed from squeaky first notes to learning to play actual songs on her paid-off flute.
- I read up on how to strip paint off woodwork.
- I raked leaves in my own front yard.
- I sat on my front porch and watched it snow.
- I felt like I truly have my own space, a refuge, a place that I belong.
I'm not going to kid you, it was a breathtakingly expensive month. My bank account is leaner, but my heart is very full.
Wednesday, December 03, 2014


Wednesday, November 26, 2014
What’s the best way to attract the attention of an 11 year
old girl, who is upstairs and apparently ignoring my calls to come down for
dinner?
Whistle Katniss’s four-note mockingjay song (from the Hunger Games) at the bottom of the stairs. She came running and peered wide-eyed down at me.
I giggled at her for a solid 10 minutes.
Seriously, though, I think she has gotten more out of this series than just the adventure story. Emma’s class read the first book of the series in school, and watched the movie. She then proceeded to devour the last two books on her own initiative, and we watched the movies together after she was done reading. She finished the third book in time for us to go to the matinee of Mockingjay Part 1 on Sunday. I read these books a few years ago, and watched the first two movies when they came out on Netflix. It's great that Emma’s growing up enough for us to go to the theater together for the last two.
She’s been all about Katniss this fall, and this sixth grader has made some very astute comments on recent world events. At various points over the past month she has talked to me, with understanding and insight, about how a dystopian society can form following a war or plague, about how oppression of a group of people by a privileged upper class leads to disaster, and how Katniss, Harry Potter, and Luke Skywalker have proved that ordinary people can change the world.
Thursday, October 30, 2014

Thursday, October 09, 2014
Sunday, October 05, 2014
As I've mentioned a couple times over the years, I like orchids. I like seeing native wild ones while hiking, and I like growing the tropical ones at home. They're just such amazing plants.
Over the years I've had lots of orchid plants, but with various house moves and shifting around, most haven't made it. Also, I don't have a greenhouse and prefer to keep my home on the cold side during the winter to save energy. Most tropical orchids don't like that, at least the ones that will also tolerate very warm summer temperatures.
My houseplant-orchid obsession began in 1996, when I was working in a plant shop in Chapel Hill, North Carolina. I had just finished my Masters degree, which apparently made me either over-qualified or under-qualified for every science job in the area. So I ended up in retail for a couple years.
During breaks I would read the reference books we kept behind the counter, and the book on orchids was a favorite. The flower that enraptured me most was Aerangis mystacidii. It was the one that I kept going back to look at. It's native to southeast Africa, stays small, and the blooms are clean white stars with long spurs full of nectar. And bonus: the book said it was strongly fragrant at night and early morning (to attract the moths that pollinate it)! Even the name sounded like something out of a fairy tale.
I finally tracked down one for sale in 2008. It was a seedling and had never bloomed, but was a healthy plant. It had three leaves and four roots when I got it. I hung it on my kitchen cabinet where it got indirect afternoon sun, and it put out a leaf or two per year and lots of roots, but still never bloomed. However, the plant itself was very compact and pretty, and I was tickled just to have this species that first caught my interest.
I was patient. And my patience was rewarded.
Nearly six years after this plant came to me, I now have this...
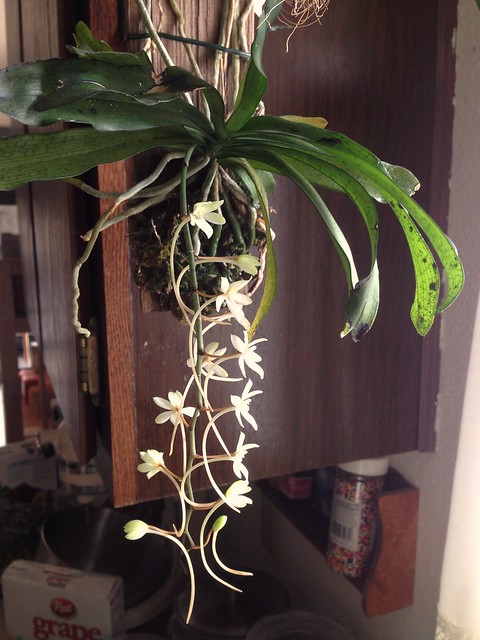
The flowers are beautiful, with the delicate white stars and long spurs that first drew me to the species.
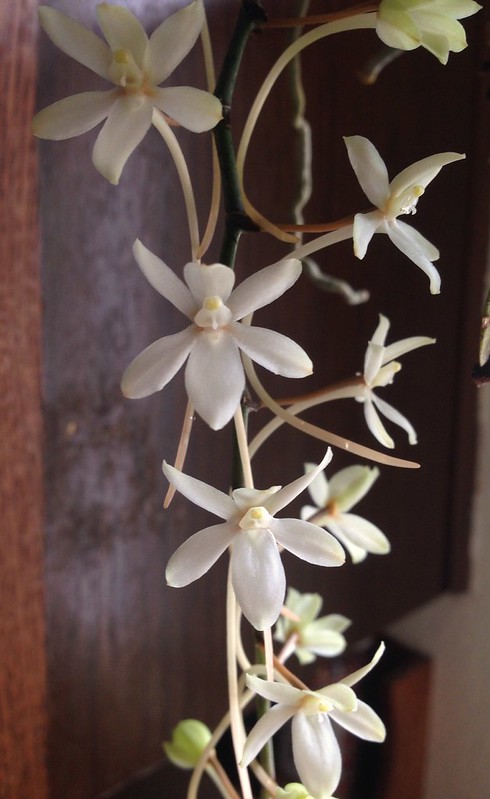
They've been open for a day and a half now, and this morning they developed the fragrance I've been waiting for. It smells like honey and stargazer lilies and gardenia and lily of the valley and something else I can't define, all mixed up together. Glorious.
I've bloomed other Aerangis species before (A. citrata and A. punctata), but THIS is the one that got me interested in orchid growing. This feels like a triumph.
Over the years I've had lots of orchid plants, but with various house moves and shifting around, most haven't made it. Also, I don't have a greenhouse and prefer to keep my home on the cold side during the winter to save energy. Most tropical orchids don't like that, at least the ones that will also tolerate very warm summer temperatures.
My houseplant-orchid obsession began in 1996, when I was working in a plant shop in Chapel Hill, North Carolina. I had just finished my Masters degree, which apparently made me either over-qualified or under-qualified for every science job in the area. So I ended up in retail for a couple years.
During breaks I would read the reference books we kept behind the counter, and the book on orchids was a favorite. The flower that enraptured me most was Aerangis mystacidii. It was the one that I kept going back to look at. It's native to southeast Africa, stays small, and the blooms are clean white stars with long spurs full of nectar. And bonus: the book said it was strongly fragrant at night and early morning (to attract the moths that pollinate it)! Even the name sounded like something out of a fairy tale.
I finally tracked down one for sale in 2008. It was a seedling and had never bloomed, but was a healthy plant. It had three leaves and four roots when I got it. I hung it on my kitchen cabinet where it got indirect afternoon sun, and it put out a leaf or two per year and lots of roots, but still never bloomed. However, the plant itself was very compact and pretty, and I was tickled just to have this species that first caught my interest.
I was patient. And my patience was rewarded.
Nearly six years after this plant came to me, I now have this...
The flowers are beautiful, with the delicate white stars and long spurs that first drew me to the species.
They've been open for a day and a half now, and this morning they developed the fragrance I've been waiting for. It smells like honey and stargazer lilies and gardenia and lily of the valley and something else I can't define, all mixed up together. Glorious.
I've bloomed other Aerangis species before (A. citrata and A. punctata), but THIS is the one that got me interested in orchid growing. This feels like a triumph.
Thursday, July 03, 2014
This has been festering in my brain for a long, long while. Especially since that travesty of justice on Monday.
Can someone please tell me why a person's right to own a gun is more fiercely protected than a woman's right to choose her own medical treatment for her own body?
Please?
Someone?
I need someone to explain this to me so I can stop feeling so completely, absolutely, overwhelmingly disgusted with the country I live in.
I don't know why the Supreme Court or a corporation needs to be involved in the issue of whether or not a woman can use birth control if she so chooses. I don't know why this is EVEN AN ISSUE AT ALL.
Saturday, June 14, 2014
Yes, another cast iron pan. I told you, it's an obsession!
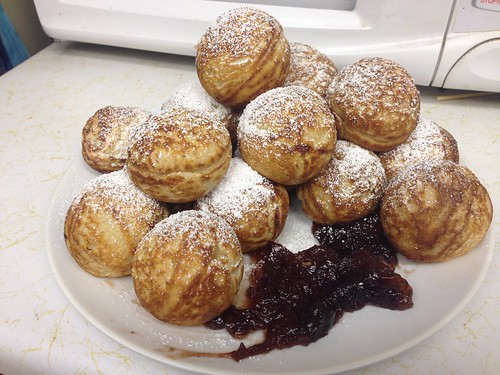
This is called an aebleskiver pan, and is is used to make a Danish pancake/pastry treat, traditionally served around Christmas time. They're like spherical pancakes made with a rich egg batter, crispy on the outside and fluffy on the inside.
I had never even heard of aebleskiver until two months ago when my cast iron obsession started. I kept seeing these weird pans for sale on eBay, and had to go to Google to find out what they were used for. Well, predictably, one thing led to another and I ended up with this:

This is a Griswold pan, made sometime before 1957 (the picture shows the underside). I bought this at the beginning of April, but it's been in the lye bath since then for de-gunking, and I just got around to seasoning it last week.
As you can see, it has seven hemispherical wells, in which to cook the aebleskiver. You pour the batter in, then do a series of half-flips to create the spherical pancake-balls. Kind of hard to explain, so go watch this video.
When you're done, you get these great little treats. I flavored mine with cinnamon, cardamom, and lemon zest.

This was so fun! And they were so tasty, served piping hot with powdered sugar and home made strawberry-lemon jam. Yum!
This is called an aebleskiver pan, and is is used to make a Danish pancake/pastry treat, traditionally served around Christmas time. They're like spherical pancakes made with a rich egg batter, crispy on the outside and fluffy on the inside.
I had never even heard of aebleskiver until two months ago when my cast iron obsession started. I kept seeing these weird pans for sale on eBay, and had to go to Google to find out what they were used for. Well, predictably, one thing led to another and I ended up with this:
This is a Griswold pan, made sometime before 1957 (the picture shows the underside). I bought this at the beginning of April, but it's been in the lye bath since then for de-gunking, and I just got around to seasoning it last week.
As you can see, it has seven hemispherical wells, in which to cook the aebleskiver. You pour the batter in, then do a series of half-flips to create the spherical pancake-balls. Kind of hard to explain, so go watch this video.
When you're done, you get these great little treats. I flavored mine with cinnamon, cardamom, and lemon zest.
This was so fun! And they were so tasty, served piping hot with powdered sugar and home made strawberry-lemon jam. Yum!
Tuesday, May 20, 2014
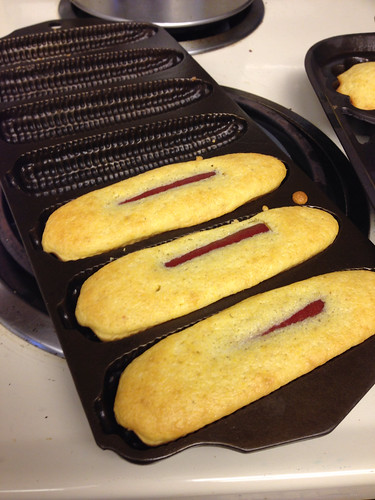
A couple nights ago, I was at a loss for what to make for dinner. I came up with this:

Home-made corndogs. Now as a general rule, I am anti-corndog. Emma isn't allowed to order them when we eat out, because the commercial ones are just disgusting and contain who knows what.
But these are OK, I think. I serve cornbread on a regular basis, and hot dogs on occasion (as long as I can pick out the brand I like, without all the chemicals). So... cornbread from scratch, with hotdog pieces baked in. I can do that.
These earned me an amazed look and a hug that nearly knocked me over.
"You made corndogs? You made CORNDOGS? You MADE corndogs? You're the best mom ever!"
The first four corndogs disappeared in short order, and the rest are in the freezer to be pulled out as needed. Perhaps as bribes to get the resident pre-teen to clean her room....
Sunday, May 04, 2014
Yes, more cast iron. It's officially an obsession. :-)
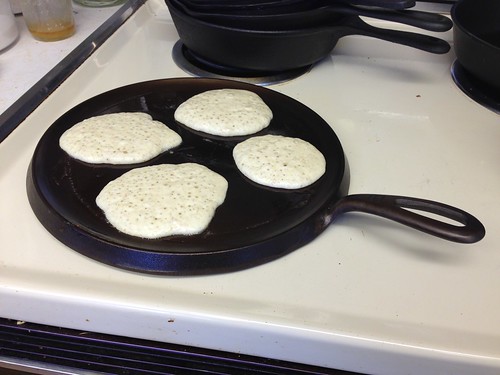
This is a Griswold #9 griddle, made sometime between 1925 and 1940. It has a cooking surface diameter of 10.5 inches. This pan was thrown in for FREE when I bought a dutch oven at an antique store here in town. (I don't know how I came away with two more pieces of iron... I just went in to look, honest...)

It's in GREAT condition. There was a bit of rust on the bottom side, which easily cleaned up with some vinegar and steel wool. It left a very small amount of pitting, but as you can see from the photo above, it's barely noticeable.
The cooking surface is completely unblemished. Look at how smooth it is!

I've never owned a griddle before, and I love it. It's great for things that need to be flipped, since there aren't any sides to obstruct access with a spatula. All I want to do is cook pancakes now!
This is a Griswold #9 griddle, made sometime between 1925 and 1940. It has a cooking surface diameter of 10.5 inches. This pan was thrown in for FREE when I bought a dutch oven at an antique store here in town. (I don't know how I came away with two more pieces of iron... I just went in to look, honest...)
It's in GREAT condition. There was a bit of rust on the bottom side, which easily cleaned up with some vinegar and steel wool. It left a very small amount of pitting, but as you can see from the photo above, it's barely noticeable.
The cooking surface is completely unblemished. Look at how smooth it is!
I've never owned a griddle before, and I love it. It's great for things that need to be flipped, since there aren't any sides to obstruct access with a spatula. All I want to do is cook pancakes now!
Thursday, May 01, 2014
I had to go to Prineville, Oregon, this week for work, and along the way my co-worker and I stopped off at the Painted Hills Unit of the John Day Fossil Beds National Monument to take our lunch break.
It was stunning.

The bands of color in the hills are created by the different rock/soil types, and were just amazing.
There were also some beautiful wildflowers; this is a wild onion, Allium sp.

I don't have much to say in this post, because the pictures say it all.

There's a geocache here too, and I'm glad I planned it out right to make this my 600th find. I like to get special caches on the milestones, and this one definitely fits.

Oregon is such an amazingly beautiful and varied state.
It was stunning.
The bands of color in the hills are created by the different rock/soil types, and were just amazing.
There were also some beautiful wildflowers; this is a wild onion, Allium sp.
I don't have much to say in this post, because the pictures say it all.
There's a geocache here too, and I'm glad I planned it out right to make this my 600th find. I like to get special caches on the milestones, and this one definitely fits.
Oregon is such an amazingly beautiful and varied state.
Monday, April 21, 2014
Emma and I went for an Easter hike at Phillips Lake, which is a man-made reservoir on the Powder River, about 45 miles south of La Grande.
Even though we only hiked about three miles round trip, it was a lovely way to spend the afternoon, and we got a geocache to boot!
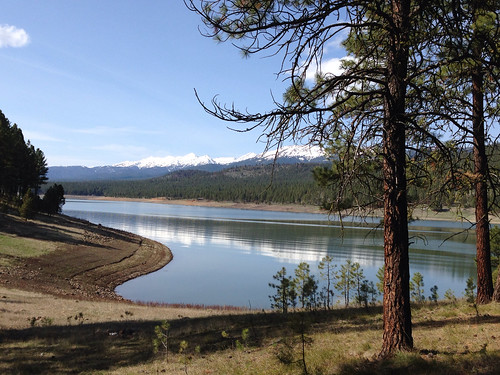
I love this time of year, when the valleys and lower slopes are green and flowery, while the tops of the mountains are still snow covered. The peaks north of the lake are the Elkhorn Mountains. We will be hiking along the tops of those mountains later this summer.
Emma's doing a unit in school about forests and plants, and one of her assignments is to create a photographic plant collection, so she spent some time looking for flowers and getting pictures. She had a ball.
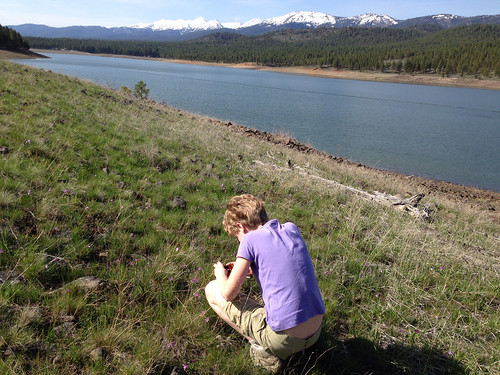
I cannot even express how glad I am that she likes doing the same sort of thing that I do. I love my girl and we love being outside.

The wildflowers are in full swing, and the slopes were covered. This wallflower daggerpod is a new one for me, Phoenicaulis cheiranthoides. Very pretty.
Along the way, Emma spied a branch floating in the lake, and had to go check it out.

Then she had to "rescue" it.

And then she had to haul it somewhere.
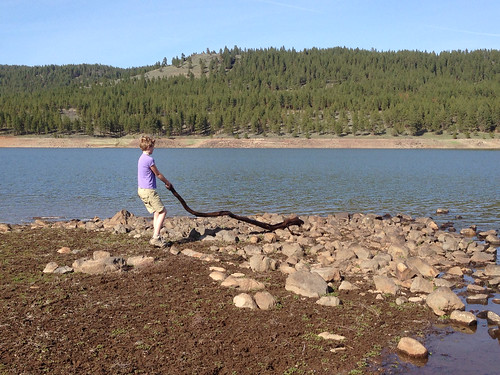
But where?
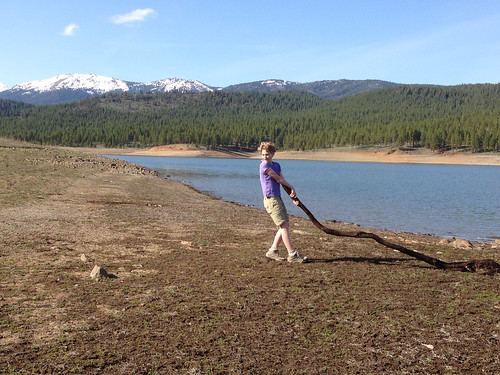
Ah! It had to go ALL the way up the beach to our dinner spot at the base of the bluff . Success! She's so funny.
So this is where Emma and I had Easter Dinner, a dehydrated hiking meal I made (spaghetti and meat sauce), satsumas, and trail mix. Not exactly traditional Easter fare, but it was fantastic. We sat on the beach, listened to the loons calling, and watched the changing light on the mountains and lake.

(Note, please, the rescued branch.)
We finally had to head back, and Emma decided that she wanted to carry the backpack for the mile and a half back to the car. This is my day pack, 28 liter size, and is a great fit for her. This will work out perfectly when we go backpacking this summer. She'll be able to carry her own sleeping bag, clothes, water, and snacks.
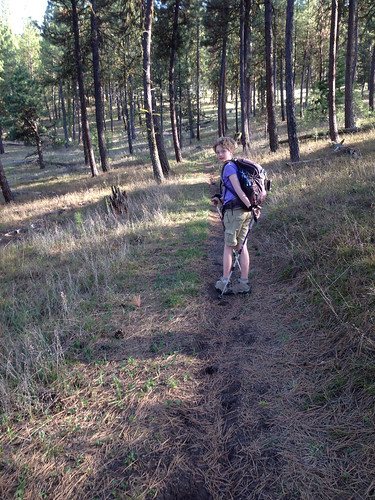
It was a really, really great day.

Even though we only hiked about three miles round trip, it was a lovely way to spend the afternoon, and we got a geocache to boot!
I love this time of year, when the valleys and lower slopes are green and flowery, while the tops of the mountains are still snow covered. The peaks north of the lake are the Elkhorn Mountains. We will be hiking along the tops of those mountains later this summer.
Emma's doing a unit in school about forests and plants, and one of her assignments is to create a photographic plant collection, so she spent some time looking for flowers and getting pictures. She had a ball.
I cannot even express how glad I am that she likes doing the same sort of thing that I do. I love my girl and we love being outside.
The wildflowers are in full swing, and the slopes were covered. This wallflower daggerpod is a new one for me, Phoenicaulis cheiranthoides. Very pretty.
Along the way, Emma spied a branch floating in the lake, and had to go check it out.
Then she had to "rescue" it.
And then she had to haul it somewhere.
But where?
Ah! It had to go ALL the way up the beach to our dinner spot at the base of the bluff . Success! She's so funny.
So this is where Emma and I had Easter Dinner, a dehydrated hiking meal I made (spaghetti and meat sauce), satsumas, and trail mix. Not exactly traditional Easter fare, but it was fantastic. We sat on the beach, listened to the loons calling, and watched the changing light on the mountains and lake.
(Note, please, the rescued branch.)
We finally had to head back, and Emma decided that she wanted to carry the backpack for the mile and a half back to the car. This is my day pack, 28 liter size, and is a great fit for her. This will work out perfectly when we go backpacking this summer. She'll be able to carry her own sleeping bag, clothes, water, and snacks.
It was a really, really great day.
Thursday, April 17, 2014
So... I seem to have fallen down a bit of a rabbit hole with the cast iron pans. I somehow have acquired two more skillets and a muffin pan in the past week. To be fair, I was given one of the skillets and the muffin pan when I was rambling on at work about how cool old cast iron pans are and how awesome they are to cook in. But I did buy one on my own.
Anyway, to the point of this post: how I clean and season a cast iron pan:
Step 1) Find a cast iron pan. This is a Griswold #3 skillet, 6" diameter, made between 1939 and 1944. I found this in an antique shop here in La Grande on Monday. It seemed to be in pretty good condition, and wasn't too gunky and rusty, so I bought it.
This isn't the most dramatic pan I could have found to demonstrate, but oh well. Here it is in as-bought condition, dust and all.
Step 2) Strip off the old crusty, gunky, sticky, dirty seasoning. There are a number of ways to do this.
The lye bath can be reused to clean many pans, even if it gets really cruddy and black. So there you go. I need to find more pans to clean.
This pan wasn't too bad and only took overnight to get clean in the lye, but one of the others I got was so caked that it's been in the lye almost a week and it still has some crusty spots. So here you go, a formerly yukky pan, now down to bare metal, ready for re-seasoning.
Step 3) De-rust, if necessary. This pan wasn't rusty, but if it had been I would have soaked it in the vinegar solution for up to an hour at a time and scrubbed with steel wool to get off the rust. Unlike the lye, vinegar will eat away at the metal, and you can't leave it soaking for a long time. Frequent checks required!
There is an alternative method to getting rust off, which is using electrolysis. It involves a car battery charger, an electrolyte solution, and a piece of sacrificial metal, and is more expensive and involved than I want to deal with right now. It apparently works great, though, especially on intricate or heavily rusted pieces. Plus, less scrubbing.
I don't have any pictures of de-rusting yet, because that piece is still in the lye bath. Stay tuned.
Step 4) Re-season. Once the old seasoning is stripped off and the rust is gone, you're left with bare iron. Once you're at that point, you need to re-season immediately, or at least get a coat of oil on the pan, because it wants to start rusting right away. You may get a little flash-rust during drying, but that's ok because it will rub off with the first coat of oil.
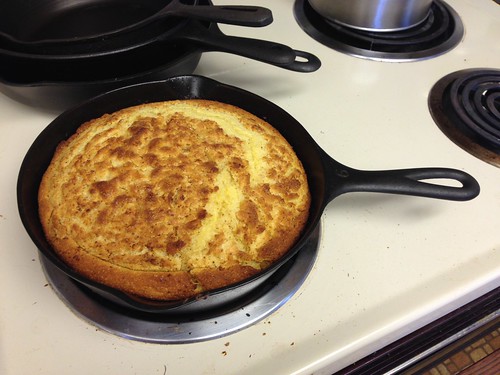
Here's the final seasoned pan. Isn't it pretty!! I love it. This cute little pan is the perfect size for an egg or two. Or a 2 serving cornbread!
If you're just re-seasoning one of your own pans that's in reasonable condition, and not one that you dug out of the bottom shelf of an antique store, you may not need to do the whole lye bath/de-rusting thing and take it completely down to bare metal. You can just scrub really well with soap and hot water to get the majority of the old sticky seasoning off, then rinse, dry, and continue on with Step 4. If the surface is uneven with caked old seasoning, though, you might still want to strip it completely.
After cooking, I don't wash my pans with soap, I just scrape out any food bits, rinse if needed, and wipe it dry. Then I heat it up gently on the stove to completely dry it and wipe on a very very very thin layer of bacon grease or veggie oil if it's needed. I usually use bacon grease because I have a little jar right there next to my stove and it's handy. I heat it until it just barely starts to smoke then turn off the burner, wipe it with a clean towel to make sure there's no excess oil, and leave the pan on the burner to cool slowly. Done and ready for next time. It took longer to type all that than it actually takes to clean and dry the pan.
I'm a convert, not that I ever used anything but uncoated stainless steel pans anyway (no Teflon in my house!). But eggs are so much more fun to cook in cast iron! Use your cast iron pans and enjoy them, they're great!
Anyway, to the point of this post: how I clean and season a cast iron pan:
Step 1) Find a cast iron pan. This is a Griswold #3 skillet, 6" diameter, made between 1939 and 1944. I found this in an antique shop here in La Grande on Monday. It seemed to be in pretty good condition, and wasn't too gunky and rusty, so I bought it.
This isn't the most dramatic pan I could have found to demonstrate, but oh well. Here it is in as-bought condition, dust and all.
Step 2) Strip off the old crusty, gunky, sticky, dirty seasoning. There are a number of ways to do this.
- One oft-recommended method is to put the pan in the oven and run the self-clean cycle. This is quite effective at burning off all the organic material from the metal. You're left with bare metal and a powdery coating of ash which is easily washed off. The oven will not remove rust. I used the oven method on a pan in the past, and it stinks up the house. Though it works, and while I got lucky on the one I did, a major drawback is that it could warp or even crack the pan due to the temperature fluctuations of the self-cleaning cycle. I would not recommend this method, or even worse, the common suggestion to chuck it in a campfire. Not if you value the pan and want to keep it in good condition.
- The second oft-recommended way to clean a gunky iron piece is to put it in a trash bag and liberally coat it with heavy duty oven cleaner, then let it sit until the gunk is softened up and will wash right off. Depending on the depth of gunk, it can take anywhere from a day to a week or more, and it may need to be re-sprayed. I used this method exactly once, and said never again. It's horrendously messy. It worked fine and took the pan down to bare metal without the risk of warping, but great googly, what a mess when opening the bag to take out the piece. Plus, oven cleaner is primarily lye (sodium hydroxide, NaOH), and it made me very uncomfortable to be spraying that, not to mention dripping it around when trying to get the pan out of the bag and rinsed off. I wore gloves and eye protection, but I could still smell the fumes and I don't want aerosolized lye in my lungs. So that method is off the table for me from now on.
- The third cleaning method, and the one most recommended by cast iron collectors, is to use a lye bath. I was very hesitant to do this at first, because...lye, eek!.... but really it's fine. I got a 16-ounce container of lye (drain cleaner, 100% NaOH, no additives) at the hardware store and added it to five gallons of water in a 10-gallon heavy duty lidded rubbermaid bin. Never do it the other way around: never ever add water to lye, it generates heat and will literally boil up and try to hurt you. So lye into water, and voila, lye bath. Then you just
toss in the pancarefully place in the pan without splashing, and let it soak until the gunk wipes off. Easy peasy. The lye won't harm the iron, so a pan can stay in the lye bath indefinitely, until it's clean and I'm ready to season it.
The lye bath can be reused to clean many pans, even if it gets really cruddy and black. So there you go. I need to find more pans to clean.
This pan wasn't too bad and only took overnight to get clean in the lye, but one of the others I got was so caked that it's been in the lye almost a week and it still has some crusty spots. So here you go, a formerly yukky pan, now down to bare metal, ready for re-seasoning.
Step 3) De-rust, if necessary. This pan wasn't rusty, but if it had been I would have soaked it in the vinegar solution for up to an hour at a time and scrubbed with steel wool to get off the rust. Unlike the lye, vinegar will eat away at the metal, and you can't leave it soaking for a long time. Frequent checks required!
There is an alternative method to getting rust off, which is using electrolysis. It involves a car battery charger, an electrolyte solution, and a piece of sacrificial metal, and is more expensive and involved than I want to deal with right now. It apparently works great, though, especially on intricate or heavily rusted pieces. Plus, less scrubbing.
I don't have any pictures of de-rusting yet, because that piece is still in the lye bath. Stay tuned.
Step 4) Re-season. Once the old seasoning is stripped off and the rust is gone, you're left with bare iron. Once you're at that point, you need to re-season immediately, or at least get a coat of oil on the pan, because it wants to start rusting right away. You may get a little flash-rust during drying, but that's ok because it will rub off with the first coat of oil.
- Start with scrubbing and rinsing well, you can even wash with dish soap (for the last time ever) if you want. Then dry the pan and put it in a low oven, about 200-225 degrees F, so that all the moisture evaporates. Put the pan in the cold oven, so it heats up slowly with the oven. Leave it in for 15-20 minutes.
- Once the oven is at temperature and the pan is hot, take it out and give it a good coat of oil. The internet has many people with many strongly-held beliefs about which oil is better than which other oil, but I use solid vegetable shortening (Crisco) and it works fine. Wipe on a good coat so the whole pan is glistening, inside and out, then take a clean paper towel (or cloth if the surface is rough and shreds paper towels) and wipe it all off. No, really, wipe it like you want to get all that oil back off. A very very very thin layer will be left on the metal, and that's all you want. A thick layer will pool and spot and get sticky. A thin layer will polymerize evenly and give the hard slick coating you want.
- Put the pan back in the oven, upside down, and turn it up to 350 F. You put it upside down so there is minimal contact between the pan and the oven rack, otherwise the bottom of the pan might season unevenly. You won't need to worry about drips if you wiped the oil off sufficiently.
- Wait 15-20 minutes, then give the pan another wipe down with a dry cloth, just to make sure there's no excess oil.
- Put it back in the oven, upside down again, and turn it up to 450F. Leave it in for 30 minutes once it's up to temperature, then turn the oven off and let it cool completely without opening the oven.
Here's the final seasoned pan. Isn't it pretty!! I love it. This cute little pan is the perfect size for an egg or two. Or a 2 serving cornbread!
If you're just re-seasoning one of your own pans that's in reasonable condition, and not one that you dug out of the bottom shelf of an antique store, you may not need to do the whole lye bath/de-rusting thing and take it completely down to bare metal. You can just scrub really well with soap and hot water to get the majority of the old sticky seasoning off, then rinse, dry, and continue on with Step 4. If the surface is uneven with caked old seasoning, though, you might still want to strip it completely.
After cooking, I don't wash my pans with soap, I just scrape out any food bits, rinse if needed, and wipe it dry. Then I heat it up gently on the stove to completely dry it and wipe on a very very very thin layer of bacon grease or veggie oil if it's needed. I usually use bacon grease because I have a little jar right there next to my stove and it's handy. I heat it until it just barely starts to smoke then turn off the burner, wipe it with a clean towel to make sure there's no excess oil, and leave the pan on the burner to cool slowly. Done and ready for next time. It took longer to type all that than it actually takes to clean and dry the pan.
I'm a convert, not that I ever used anything but uncoated stainless steel pans anyway (no Teflon in my house!). But eggs are so much more fun to cook in cast iron! Use your cast iron pans and enjoy them, they're great!
Wednesday, April 09, 2014
Tuesday, April 08, 2014
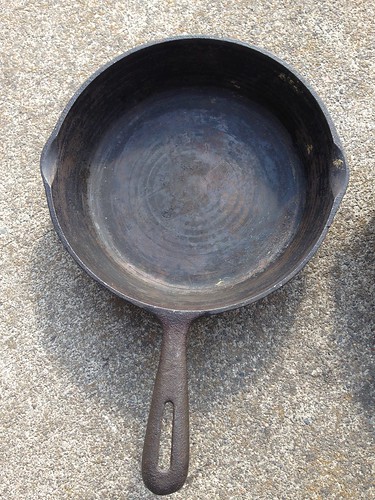
I love "my" thrift store up in Kennewick, Washington. I scored this weekend.
Three cast iron skillets, in pretty good condition, for only $2 each! Wahoo!
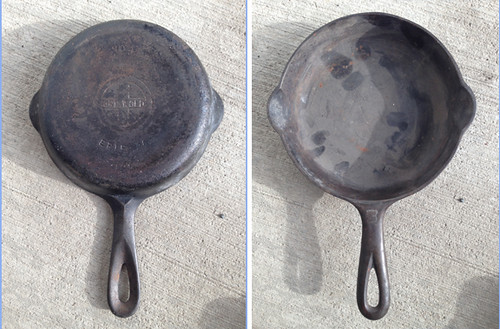
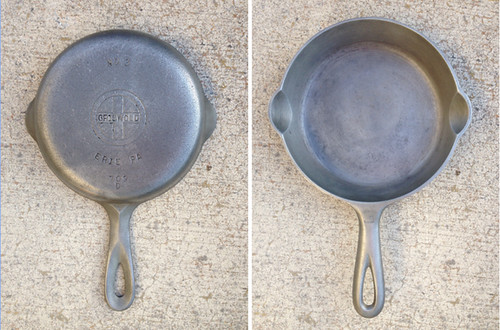
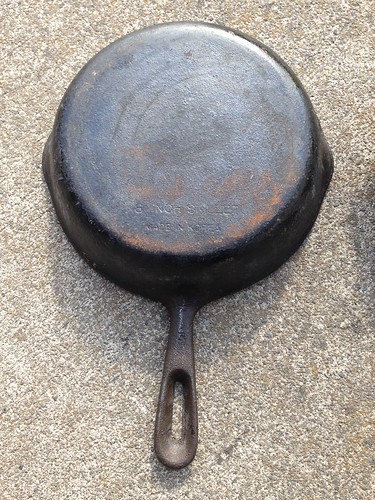
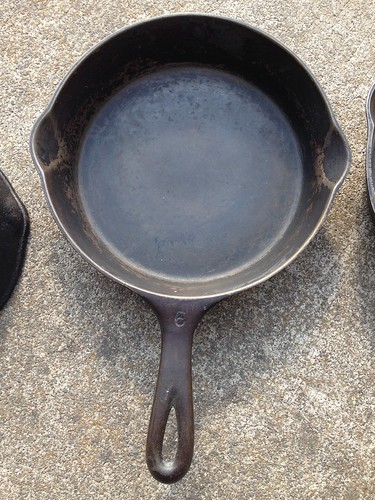
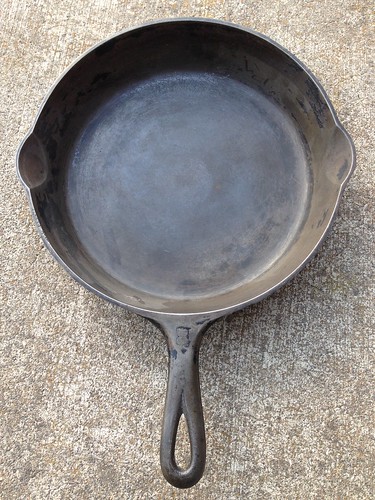
They weren't too gunked up or rusted, as you can see above, but still needed to be stripped and re-seasoned. These first pictures are of the as-bought condition, before re-seasoning.
The smallest one is a random Korean-made #3 skillet, 8" diameter. It's nothing special in and of itself and probably not very old (maybe 1980s?), but it's very smooth inside.
The middle size one is a Wagner Ware #6 skillet, 9" in diameter. This skillet was made some time between 1924 and 1935. (Wow!) It's in good condition, with some minor old rust pitting marks inside, but it's sound and sits perfectly level.

This pan is interesting because it's so much lighter than modern cast iron pans, and much thinner-walled. It's the lightest of the three I got this weekend. I hadn't realized before doing my internet research that this is the norm for older pans, since they weren't machine-made. Makes sense, I guess, since they didn't have to be able to handle the rougher automated manufacture, including machine tumbling.
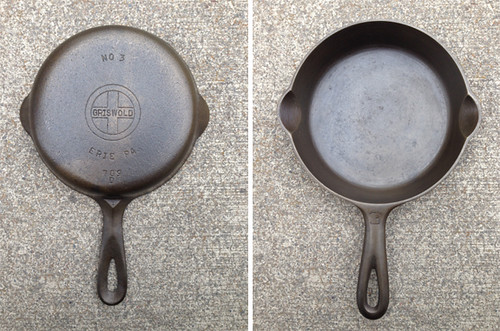
The largest pan is a Griswold #8, 10.5" in diameter. This pan was made between 1939 and 1944 (Wow!), and is also lighter and thinner-walled than modern pans, though not as thin as the Wagner Ware. This is also in good condition, with few blemishes, and sits flat.
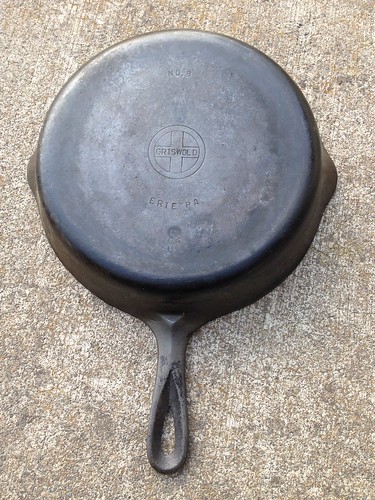
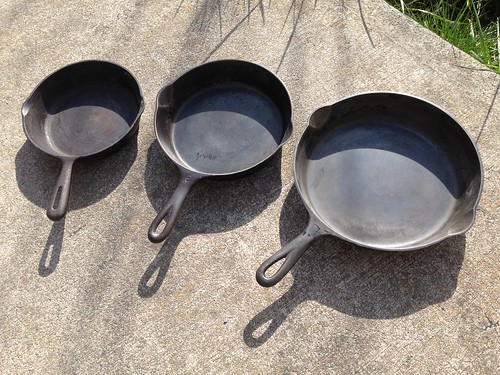
Now even though these pans are moderately old, they're not really that rare. Griswold and Wagner Ware are the "collectible" brands, but these are pretty common models and would usually sell for $20 or less. However, I'm happy with them (especially for $2!), they will be great for cooking, and look how pretty they cleaned up!
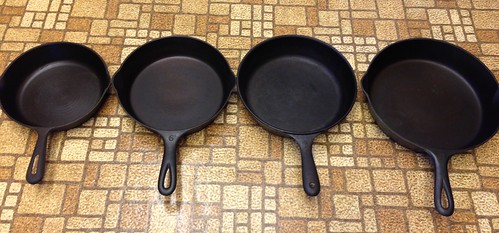
Left to right again, that's the Korean #3, the Wagner Ware #6, an unmarked pan given to me by a friend a few months ago (the interwebs tell me it may have been made by American Brass & Iron out of Oakland, CA, in the 70s/80s), and the Griswold #8. You can see how much smoother the old Wagner Ware and Griswold are, especially compared to the newest one (third from left).
It's pretty humbling to cook with a pan that is 80-90 years old. Imagine how many family meals it has prepared...
And still going strong!
Three cast iron skillets, in pretty good condition, for only $2 each! Wahoo!
They weren't too gunked up or rusted, as you can see above, but still needed to be stripped and re-seasoned. These first pictures are of the as-bought condition, before re-seasoning.
The smallest one is a random Korean-made #3 skillet, 8" diameter. It's nothing special in and of itself and probably not very old (maybe 1980s?), but it's very smooth inside.
The middle size one is a Wagner Ware #6 skillet, 9" in diameter. This skillet was made some time between 1924 and 1935. (Wow!) It's in good condition, with some minor old rust pitting marks inside, but it's sound and sits perfectly level.
This pan is interesting because it's so much lighter than modern cast iron pans, and much thinner-walled. It's the lightest of the three I got this weekend. I hadn't realized before doing my internet research that this is the norm for older pans, since they weren't machine-made. Makes sense, I guess, since they didn't have to be able to handle the rougher automated manufacture, including machine tumbling.
The largest pan is a Griswold #8, 10.5" in diameter. This pan was made between 1939 and 1944 (Wow!), and is also lighter and thinner-walled than modern pans, though not as thin as the Wagner Ware. This is also in good condition, with few blemishes, and sits flat.
Now even though these pans are moderately old, they're not really that rare. Griswold and Wagner Ware are the "collectible" brands, but these are pretty common models and would usually sell for $20 or less. However, I'm happy with them (especially for $2!), they will be great for cooking, and look how pretty they cleaned up!
Left to right again, that's the Korean #3, the Wagner Ware #6, an unmarked pan given to me by a friend a few months ago (the interwebs tell me it may have been made by American Brass & Iron out of Oakland, CA, in the 70s/80s), and the Griswold #8. You can see how much smoother the old Wagner Ware and Griswold are, especially compared to the newest one (third from left).
It's pretty humbling to cook with a pan that is 80-90 years old. Imagine how many family meals it has prepared...
And still going strong!
Saturday, March 29, 2014
I gave my new-ish tent a test pitch in the pouring rain last night, because it's been far too long since I've been camping and I couldn't stand it any more.
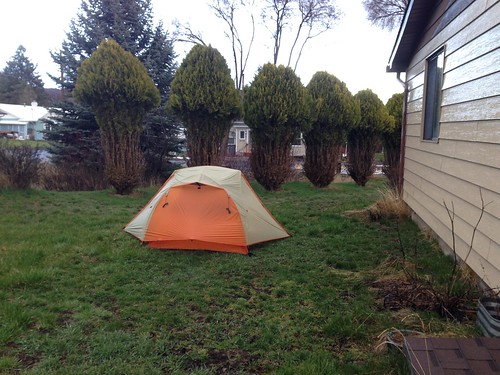
This is only the second time I've used this tent, a sad situation that obviously must be remedied by many camping trips with Emma this summer. I've never had it out in the rain, so this was a good chance to see if it leaks. I also used my new down sleeping bag for the first time, so I was a little nervous about the rain. Wet down is fairly useless.
When I got up at 7am the temp was about 36 according to my little thermometer and there was some ice on the grass, but I woke up cozy, toasty, and dry!
So yes, it was just a tent in the yard and wasn't really camping. But... I was outside and got to fall asleep listening to the rain on the tent roof, and the wind, and the creek.
It was the best night's sleep I've had in a while- I slept 10 hours!
Tuesday, March 11, 2014
Just in case you were wondering, five pounds of carrots can be washed, trimmed, and sliced/shredded in approximately 5 minutes, using the spiffy attachment for a KitchenAid mixer.

And five pounds of sliced/shredded carrots exactly fills a nine-tray Excalibur dehydrator. Four trays of sliced, five of shredded.
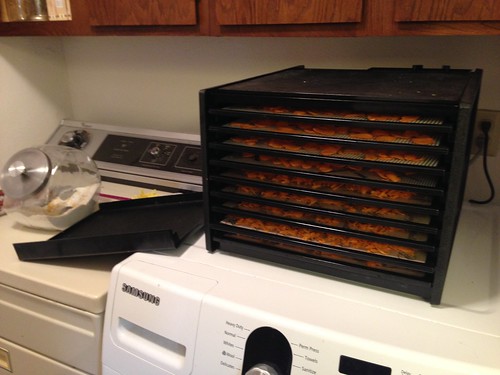
Just in case you were wondering. :-)
Oh, and Chris asked in the comments for my last post if potatoes are cooked before dehydrating. Yes, you have to cook potatoes first otherwise they turn purply-black, which is not at all appetizing. I just blanch the pieces for 3-5 minutes in boiling water, depending on how big the pieces are- you don't want them so done that they're mushy and falling apart, just cooked through. Lots of things don't have to be blanched before dehydrating (these carrots are raw), but potatoes definitely do.
And five pounds of sliced/shredded carrots exactly fills a nine-tray Excalibur dehydrator. Four trays of sliced, five of shredded.
Just in case you were wondering. :-)
Oh, and Chris asked in the comments for my last post if potatoes are cooked before dehydrating. Yes, you have to cook potatoes first otherwise they turn purply-black, which is not at all appetizing. I just blanch the pieces for 3-5 minutes in boiling water, depending on how big the pieces are- you don't want them so done that they're mushy and falling apart, just cooked through. Lots of things don't have to be blanched before dehydrating (these carrots are raw), but potatoes definitely do.
Subscribe to:
Posts (Atom)