Showing posts with label weaving. Show all posts

Saturday, June 13, 2015

It's lavender time!

Hold onto your hats, I have an actual crafty post today- I know, I can't believe it either!  And it's even sort of a weaving project!

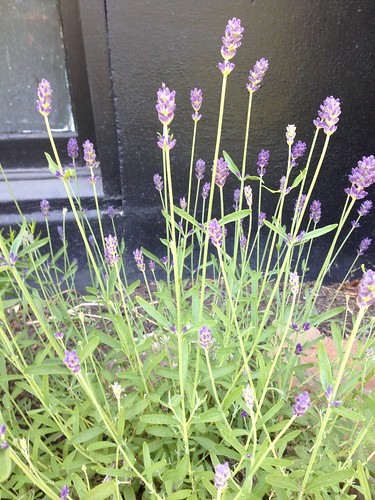
I have a ton of lavender bushes in the yard (thank you Anne!), and they are just starting to bloom.

Lavender time

I've always wanted to make a lavender wand, and today seemed like the perfect day to sit on the front porch and give it a whirl.

I cut a bunch of stalks with well developed but not-yet-open buds.  You need an odd number so the weaving works out right; this bundle had nineteen.  You also need about a yard and a half of narrow ribbon.

Lavender wand beginning

Line up the bases of the flower heads, and tie them tightly together with one end of the ribbon.  Then carefully fold the stems down around the flowers to form a sort of basket or cage, and use the long free end of the ribbon to weave over-under-over-under in a spiral down the length of the flower heads.  Keep the ribbon pulled snug around the flowers, but not so tight that you break the stems.

Lavender wand in progress

When you get to the bottom, wrap around the bundle of stems a couple times, tie a clove hitch to secure it, then a rabbit-ear bow.  Trim the stems even.

And voila! My very first ever lavender wand.

Lavender wand done!

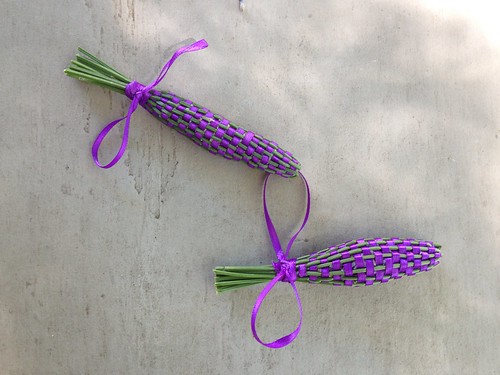
This was fun and easy, so I made two more!

Lavender wands

I foresee many lavender wands in my future this summer!

Sunday, April 29, 2012

Another wonderful weekend!  This time I went to Whidbey Island, Washington, because my friend Anne bought a LOOM!  We went up there to pick it up from the Craigslist seller.  Road trip to the Puget Sound area?  Twist my arm...

Mukilteo ferry

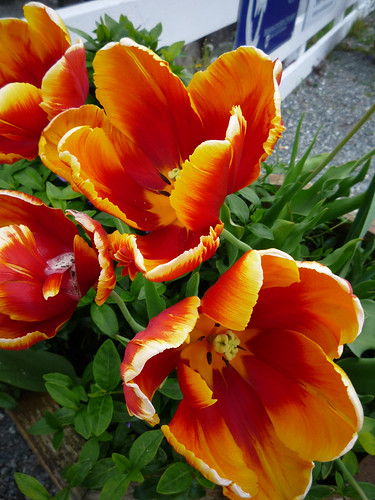
We had another weekend of gorgeous weather.  Sunny and bright, with perfect temperatures in the mid-60s. The flowers and trees were blooming, and these tulips outside of the little cafe where we had lunch were especially spectacular.

Whidbey Island tulips

The cafe was called Mosquito Fleet Chili, and great googly moogly, if you're ever in Coupeville around lunchtime, GO!  Their mussel chowder with homemade olive bread toast was out of this world.

Sadly, I have no picture of this delectable lunch.  By the time I thought of photography, all the chowder was in my tummy.

However, did I mention that the flowers were beautiful?

Whidbey Island tulip

We also went to The Weaving Works in Seattle on the way up to Whidbey, and I managed to find some yarn that had to come home with me.

embryonic projects

I have great plans for these yarns.  On the left is tencel - 2 tubes of black, 1 tube of gorgeous deep burgundy, and a cone of blue/purple/burgundy variegated. These are destined for scarves.  I've never woven with tencel before, but I've seen lots of weaving bloggers use it, and the finished projects have wonderful shine and fluidity.  Can't wait to see what I get.

On the right are three tubes of cottolin (a blend of cotton and linen) that are destined for dishtowels.  I've never woven dishtowels before, but have wanted to since I started weaving.  Since I desperately need some new ones, this seemed like a good idea.

In the middle are two cones of rayon chenille, but only one of them is new.  I've had the dark green in my stash for years- I picked it up at a guild sale in Friday Harbor in 2004.  It was originally a 2-pound cone, and I've used about half of it over the years.  The light green is new, and along with the dark green is becoming a scarf.

pinwheel weave

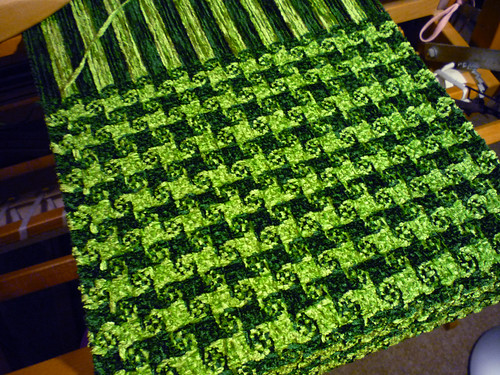
This is a pinwheel draft from the January/February 2012 Handwoven magazine.  Love this design, and the chenille fabric is coming out very plush.  I have it set at 16 ends per inch and am beating the weft in fairly firmly so that the slippery chenille doesn't wiggle around.

I love how the pinwheels swirl across the fabric.  Weaving with two shuttles is somewhat slow going, but I've gotten into a rhythm now.  I measured the warp, sleyed the reed, threaded the heddles, beamed the warp, and wove half a scarf today.

pinwheel scarf

Sunday, September 04, 2011

It is almost impossible to remain entirely unhappy when weaving a fancy twill.

woven bookmark

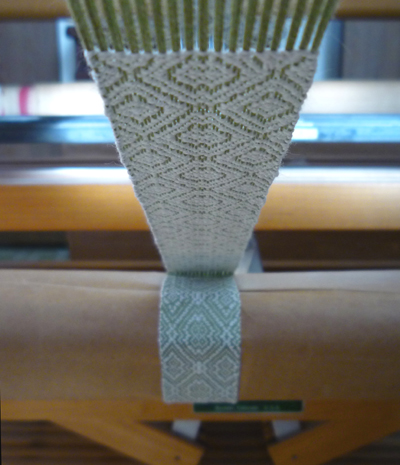
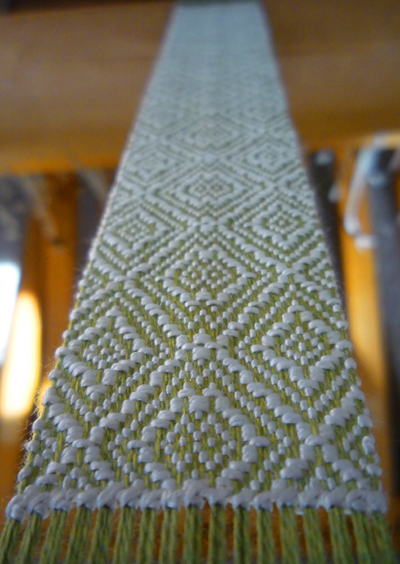
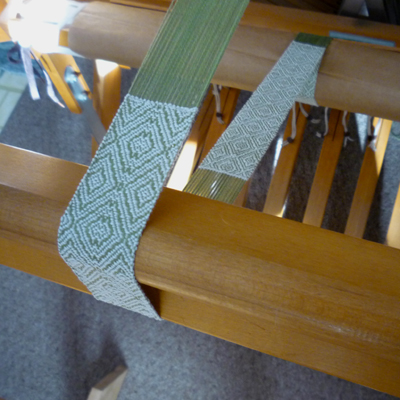
This is another warp of bookmarks.  I dyed the warp green and am using straight white for the weft in all the bookmarks.  All I have to think about is the treadling sequence, and that's just enough to keep my mind busy and unwanted thoughts at bay, without taxing it too much.

woven bookmark

It's my standard bookmark formula: 20/2 silk, 34 epi, in a twill threading and tie-up, with various treadlings.

woven bookmark

I just love watching the pattern emerge, pick by pick.  There's something very satisfying about it.

Everything is very orderly and tidy in a two-color twill.  The lines match up and follow a logical, step by step progression.  Every thread has a place and they all work together to make a harmonious whole.  If you make a mistake, it's easy to see where things went off kilter.  You can go back and fix it and then everything is OK.

My life is not a two-color twill.

woven bookmark

Wednesday, March 17, 2010

So. Weaving.

wool and bamboo scarf

The more I weave, the more I like it. When I started weaving as an adult in 2002 (not considering for now the potholders I made as a child, and the set of placemats in high school art class), I didn't like warping. For many years I didn't like warping. Measuring the warp, then sleying the reed and threading the heddles and winding it on, and making sure to get the tension tight and even.

Too fiddly. Too time consuming. Too tedious. Just let me get to the weaving part, already! Throwing the shuttle is fun, using the beater is fun, watching the pattern build is fun. I came to weaving from a background of hand needlework (cross stitch, hardanger), so I liked hemstitching and finishing the woven fabric. But if I could have had someone do all my loom preparation for me, I would have been ecstatic.

wool and bamboo scarf

Over the past couple years or so, though, things have subtly shifted. Somewhere along the line, I no longer found sleying the reed to be irksome. Then a few months later, I realized that threading the heddles was OK, too. Time consuming, yes, but not in a grit-your-teeth-and-just-get-through-it way. And I don't have problems achieving even tension while winding on to the back beam, or tying the warp to the cloth beam. I am enjoying the whole process, not just actual shuttle-throwing part.

I still find measuring warps to be the least enjoyable part. But I have high hopes that this is changing too. I didn't think twice about throwing a warp on the loom for Emma, right after cutting this one off.

wool and bamboo scarf

Anyway, as you may have guessed, I've been showing pictures of the scarf I started Friday and finished on Saturday. I twisted the fringe on Sunday, using my standard method of pinning the hemstitching to a line, then separately twisting two bundles of warp threads a certain number of turns with the fringe twister (in this case, 70 turns), making an overhand knot and pinning it to a second line and snugging the knot to that length. When I take the pin out, the two warp bundles ply themselves into a nice round firm fringe. By using this pinning method, all the fringes end up the same length.

wool and bamboo scarf

I wet finished it by agitating for 75 seconds in the washing machine, checking on it at 30, 45, 60, and 75 seconds. I know from experience that this yarn fulls/felts well and very quickly. For this project, 75 seconds was exactly the right amount of time to get a scrumptiously soft and plush fabric that is still drapey and just delicious.

wool and bamboo scarf

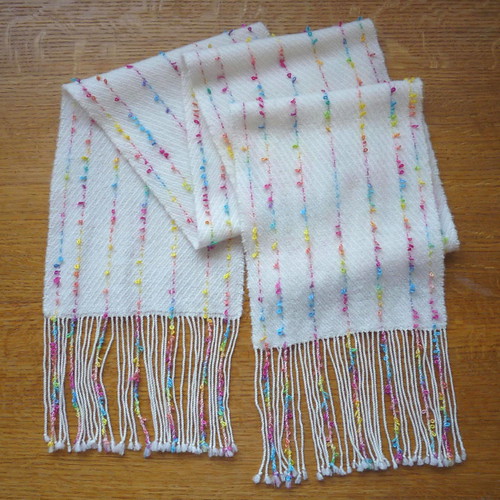
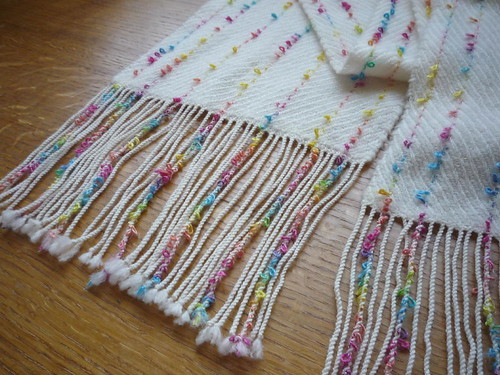
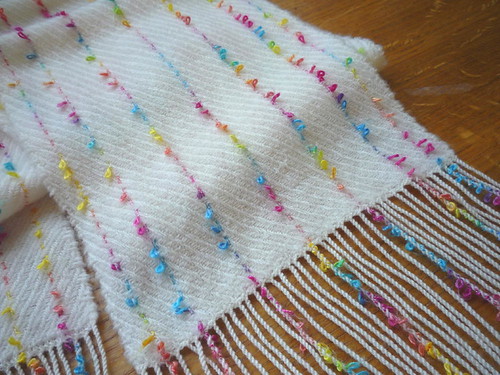
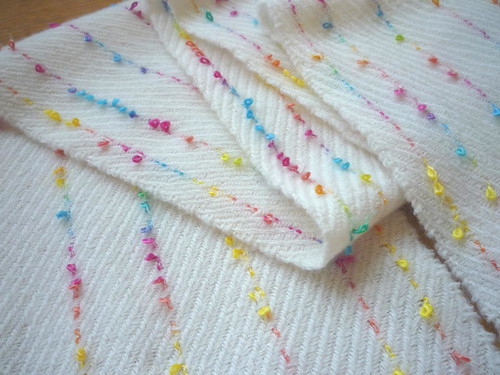
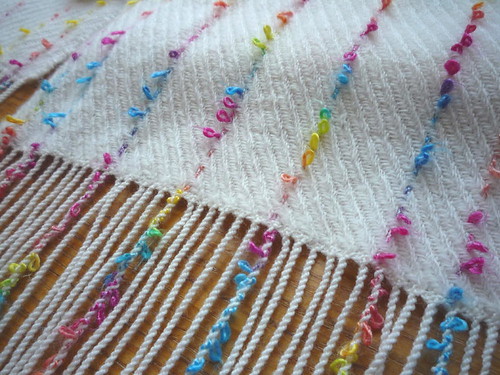
The yarn is Jaggerspun 2/18 Superfine Merino, with seven accent stripes of Jo-Ann Sensations "Bamboo," which is a boucle yarn made of bamboo rayon with a nylon binder. It's a bit Muppety if used by itself, but looks fabulous as an accent. This is a great way to use small amounts of novelty yarn.

The weave structure is a simple 4x4 straight twill, with doubled floating selvedges. I love how the boucle loops poke out and stand up from the fabric. They were smooshed into the weave a bit on the loom, but the wet finishing brought them out beautifully. The sett was 24 epi in an 8 dent reed, with no special accommodations made for the boucle.

in the reed: 10" x 68"
off the loom: 9.5" x 63"
after finishing: 8" x 58" plus 5" fringe on each end

The scarf weighs 2.9 oz (84g).

wool and bamboo scarf

Sunday, March 14, 2010

I wove a scarf yesterday, and it came out great, but that show and tell post is going to have to wait, because my heart is bursting with pride. Emma wove all by herself on the floor loom yesterday.


(Please don't mind the fuzzy hat-hair braids. She was playing outside all day. I really do brush my daughter's hair!)

She was watching me weave, and was incredibly intent and focused. When I was hemstitching the end of the scarf, she asked if she could do some weaving too.

Of course I said yes, and immediately after finishing and cutting my scarf off the loom, I measured a warp for her and put it on the loom. It's dark green 3/2 perle cotton, sleyed at 8 epi, and I told her she could use whatever weft she wanted, because it's her weaving.

I found her a shorter chair so she could reach the treadles and off she went. The first two wefts were a scratchy rust nylon and a scratchy purple wool. She had lots of fun with those, but asked me for a softer yarn because she didn't want her scarf to be scratchy. So we decided on a white superwash merino. There's an object lesson in fiber choice for you.

She's doing beautifully, and has about 6 inches of the white woven now. Her attention span is about half an hour (pretty good for six year old, I think), and her selvedges are great!

Friday, February 19, 2010

I wove off another set of bookmarks last week. This was the purple silk warp I dyed in January, along with some lighter purple silk to use as weft.


The one on top shows the lavender weft, in the sections on the ends. The rest of these have all white weft. There were two other bookmarks from this warp, which used the lavender weft, but I don't have pictures of them since they have already left my house...because...

I recently put some of my work in a gallery of local artists here in La Grande, the Blue Turtle Gallery. In a gallery! Me! In a completely uncharacteristic display of bravery, I walked into the gallery and asked the owner if she would be interested in displaying my textile creations. She was quite enthusiastic, and we set up an appointment for me to show her my work the next day. She said she's been looking for a textile artist to add to the gallery for a while, and was very impressed with what I brought to show her. So now I have woven, knit, and crochet items for sale in a gallery. Eep!

One last thing to report:


I am slowly succeeding in my plan to take over the entire house with fiber fun. This is what used to be the computer desk/bookcase in the dining room, formerly occupied by old textbooks and all our assorted clutter, and sometimes used by Shaun to work on his computer.

The bookcase part of the desk just sits on top and isn't attached, and last weekend we realized that hey, we could take that off and suddenly there's all this SPACE! We moved the bookcase part of the desk out to the utility room counter, cleared the clutter, and now I have a carding station!

Plus, the dining table is now available for actual dining, since the carder no longer resides on it.

I love having a dedicated spot for the carder, and it feels very productive to have everything set up and ready to go. Feel like carding a batt or two? Go for it! Right now I have two large bins of alpaca fleeces under the desk, which I plan to work through this spring and summer. The small box in the middle is for carding waste. On top of the counter, right to left: the carder; carding tools (flicker, batt picker, etc); a bin of "add-ins" like silk, bamboo, mohair, sparklies, etc.; bundles of hand dyed bluefaced leicester top ready for blending; a scale; a bin of finished batts; and my "office", with a desk organizer (pens, tape, stapler, etc) and the printer (with trays in the stand for paper storage).

There's plenty of space to work with the batts, pulling them apart for additional blending passes, and there's space to plug in my computer when I need to print labels or receipts. The dining table is close by if I need additional space for photographing and packaging batts.

It's working very well so far.

Monday, December 28, 2009

Now see, this is why I need to keep up with the blogging. I finished another big weaving project this fall, and I can't even remember what month it was. I think it was mid October. Could have been November. Honestly, the past couple months have been a gray blur.

One fun thing about this project was that I finally got to use my end-feed shuttle, which I bought two years ago and haven't done more that play around with. I tried it a couple times, but either the weft yarn was too thick, or the warp was too narrow, or I was scared of winding the pirns, or whatever. I finally worked out some of the kinks with this project. It really does help with the selvedges, especially in combination with using a temple. In this case, my high-tech temple consisted of a weight tied to a string, hanging off a paperclip, hooked into the edge of the web. Worked a treat.

Anyway, here are some pictures. This was a two-shawl warp, of 2/18 super fine merino, threaded in a point twill pattern of my own devising. Both shawls used the same threading, but had different treadlings. The warp sett was 25 epi, and the weft about the same. The weft was mostly the same 2/18 wool as the warp, with accent stripes of handspun, the hand dyed merino/silk singles I spun a couple years ago and named Sapphire and Amethyst.

The first shawl used the Sapphire singles, that I first used for the fancy twill shawl.


I put five stripes of the blue, of varying widths, at each end. A bit fiddly to change weft yarns that often, but I like the results.


The diamond pattern of the twill is the same across the entire shawl, I just placed the stripes at different points in the treadling to take advantage of the parts of the pattern and create variation in how the stripes look. Overall, a success.


The second shawl used the Amethyst singles, first used to make the triple bird's eye shawl.


For this shawl, I took a little different approach. There is a ground pattern of a fairly simple diamond twill, but the wider accent stripes use a different treadling. The tie-up is still the same, just the treadling changed. I also made the accents different at each end, just for interest.


The left side has three stripes, the narrower of which are the same treadling as the background diamonds, with the wide center stripe using one repeat of the modified treadling. The other end of the shawl has two full repeats of the modified treadling.


I wasn't sure how this would look, but I think it works. I really like it.


--------------
And here's the commercial:
These will be available in my Etsy shop, once I get some better pictures.

Monday, October 05, 2009

I finished weaving off the 8-yard bookmark warp, plus another 2-yard warp. Actually, I finished these more than a week ago, but just haven't gotten around to photographing them. I've been busy doing contract spinning and trying to live with and around and through sorrow. Thank you to everyone for the kind comments on my last post.

Weaving these was so much fun. They're relatively fast, and varying the treadling with almost every bookmark meant that there was always something creative going on.


They looked so pretty all rolled up on the cloth beam, and then there was the delightful moment when I cut the warp off the back beam and saw them all together.


If you want to practice your hemstitching, put a bookmark warp on the loom. I got 29 bookmarks (of varying lengths, depending on the treadling pattern) out of the 8-yard warp, and another five out of the 2-yard warp, which means that I hemstitched 68 ends. I've always enjoyed hemstitching, and I got very fast at it.


Much of the warp used various colors of mercerized cotton as weft. I have five colors of fine cotton, and used them alone and in combination:
  • red alone
  • orange alone
  • alternating picks of red and orange
  • blue alone (doubled as it's very fine)
  • gray alone (doubled as it's very fine)
  • alternating picks of doubled blue and gray
  • single strands of blue and gray held together
  • brown alone
  • alternating picks of brown and red


I also did a batch with silk weft, some plain white for elegance (I just love the white on white patterned shine)


and some with a bright kelly green that I dyed. I also overdyed some of the finished bookmarks.


Left to right, these are white on white silk overdyed deep forest green, gray cotton weft overdyed purple, kelly green silk weft overdyed turquoise, orange cotton weft overdyed scarlet, and white on white silk overdyed scarlet.

The overdying worked just as I planned. Since I use Jacquard acid dyes, the cotton wefts didn't change color, only the silk warp. The gray cotton stayed gray, and the orange cotton stayed orange. The colored silk weft, the kelly green one, did change with the overdying but it is still greener than the turquoise warp, as planned. The finished bookmarks look beautifully rich and glowing. I especially like the purple and gray one.

I also did a batch with the green singles linen that I used before. I finished them the same as before, with a hot hot soak until the dye stopped leaving the linen, then setting it into the silk with citric acid and the microwave. I really like this look.


After I finished the 8-yard warp, I immediately measured out another out of the same 20/2 silk yarn. This one was only two yards but I dyed it a lovely medium forest green. I measured the warp before dyeing, and also put a skein of the same yarn in the dye pot to use as weft. Actually, I put the weft yarn in first, so that it would go slightly darker than the warp, then left them both in the kettle overnight to cool down and fully exhaust the dyebath.


These five bookmarks from the 2-yard warp are all 100% silk, and I think they are my favorites so far. The three on the left have the slightly darker forest green silk as weft, and the two on the right have white silk as weft.

(Photographing all this shiny silk has been a challenge.)

I had a thought as I was weaving all these bookmarks, especially the green warp. I'm making ribbon. This actually looks like ribbon! Handmade ribbon!


---------
The commercial: These will all be listed in my Etsy shop. If you see one you want, email me, as they will be listed over several days.

Monday, September 14, 2009

I seem to be on a weaving kick right now. I just finished up a batch of bookmarks:


This was a fun and easy project, and quite gratifying. I did this entire project yesterday, all the way from measuring the warp to ironing the finished bookmarks. The warp is 20/2 silk, and the wefts are various. Left to right, they are:
The purple and blue were plied to match the size of the warp yarn. I just did up little bits on a spindle, about 15 yards or so for each. A bookmark doesn't take much! I didn't even wet the yarns to reactivate the singles twist and balance the yarn after plying. I didn't want to wait for them to dry, so I just used them with active twist and the curling bookmark flattened out like magic when I wet-finished it.

The gold bookmark was originally to be green weft and white warp, but when I tested a piece of the linen yarn, it started losing dye (thank goodness I tested!). So I cut it off before wet-finishing the rest. The other four I finished normally (warm soapy water, moderate agitation, warm rinse, blot in a towel, iron firmly) and they came out great. I love the way wet-finishing really completes a piece of weaving. Especially silk- ironing really brings out the shine.

For the green one, though, I decided that if it wanted to bleed, well then let it bleed. I soaked it in a jar of hot water with a drop of dish soap, and shook it vigorously and repeatedly. When the soak water stopped getting darker, I added some citric acid, shook it up again, and microwaved it for three rounds of three minutes, waiting about five minutes in between. I was hoping that the silk warp would absorb the excess dye from the weft.

It worked! After the bookmark was cool, I rinsed it in hot water and no dye came out. Yay! I actually like the overdyed version better than the original white and green. The silk warp turned greeny-gold, and the linen weft turned antique bronze. It actually looks metallic, with the shine from the silk.


These are all from one 2-yard warp, with the same threading, tie-up, and warp sett (34 epi). The white and purple even have the same treadling; the difference in the look of the pattern comes from the density of the weft packing. The white one is very dense, to the point of being stiff (14 pattern repeats), while the purple one is a bit more drapey (6 pattern repeats). The other three each have a different treadling.


The draft is one I made up. The first treadling (white and purple bookmarks) was the one that I came up with at the computer while planning the project, and the other three I made up at the loom as I was weaving. Both ends of each bookmark are hemstitched.

I like them all, but I have to admit that I'm partial to the white one. It's weighty and substantial, and the white-on-white is so elegant.


Because these are made with fine yarns, they are all nice and flat and thin- one of my prime requirements for a bookmark, so that it doesn't damage the spine of the book. I enjoyed doing this so much that I immediately put another bookmark warp on the loom. Eight yards! Look for bookmarks in my Etsy shop...

Tuesday, August 25, 2009

I had a quick weaving project on the go over the past couple weeks, to put in my Etsy shop.


Quick in terms of time actually spent working on it, that is. I did most of it (measuring the warp, sleying, threading, beaming, and weaving) in two days during the week before Sock Summit. I just got around to twisting the fringe yesterday. So it was a three day weaving project, spread over three weeks.


The warp is Jaggerspun Superfine Merino 18/2, and the weft is my own handspun; the Strawberry-Rhubarb laceweight that I spun from top purchased from the Zarzuela's Fibers Etsy shop last year.


Warp: 18/2 merino, used double (4 oz, plus 0.6 oz loom waste)
Weft: handspun merino laceweight, bought as hand dyed top (45 wpi, used 1.7 oz)
12 epi (remember the warp threads are doubled)
on the loom measurements: 14" x 75"
finished measurements: 13" x 70", with 5" twisted fringe


The pattern is one from A Weaver's Book of 8-Shaft Patterns. I quite like the way it came out.


I do like the "right side", the side I was looking at as I wove, more than the reverse, though. It's the one on the right in the picture above, and looks like a diagonal basketweave, while the reverse is a very subtle zigzaggy pattern. They're both nice, but the basketweave pops more.


I also really like the way the weft works in the piece. The marled yarn and its long sections of subtly shifting color intensities is really pretty.


And it's long enough and wide enough to be worn as a stole,


as a regular scarf,


or (my favorite) as a doubled-and-looped-through scarf.


The fabric is lightweight enough that even folded in half width-wise, then doubled and looped, as in that last picture, it doesn't feel overly bulky, just snuggly and cozy.

Using my own handspun is incredibly satisfying.