
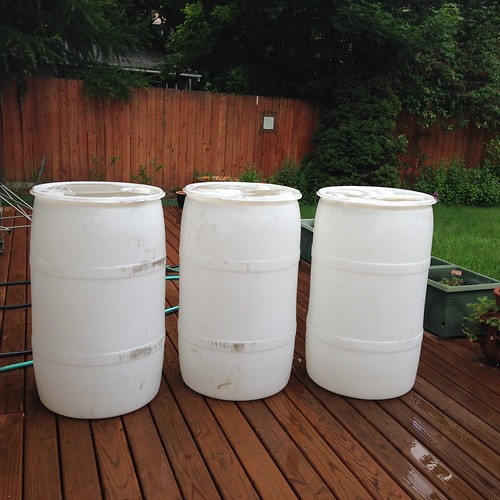
I got these three barrels from the local Coca-Cola bottling plant (free!) on June 2, right before I embarked on my two-week adventure in the sagebrush. I have always wanted a rain barrel, and with all the planters on my deck I decided that now is the time.
Then work exploded into busy-ness, and the weather was horrendously hot, and the project stagnated.
About a week ago, I had a chance to get started.
These barrels are the type that have two bungs that screw into the top, rather than a complete lid that comes off.

Quite fortuitously, the bungs have a central recess that is threaded, and matches the threads on standard PVC! So I started by drilling out the middle of one bung from each barrel.
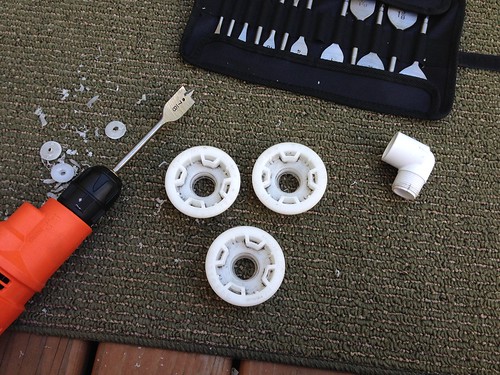
That left a threaded hole that I could screw a PVC elbow into. I sealed the bungs and elbows liberally with caulk. Hopefully that will keep everything watertight, since the tops of the barrels (with the bungs) will be on the bottom in the finished setup.
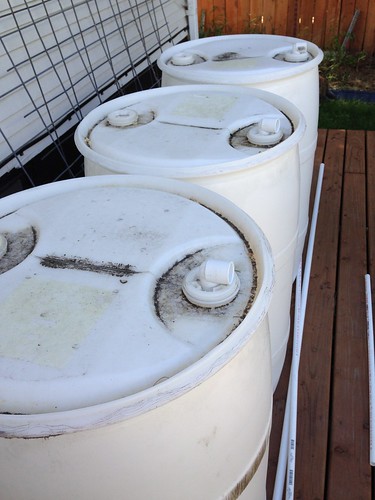
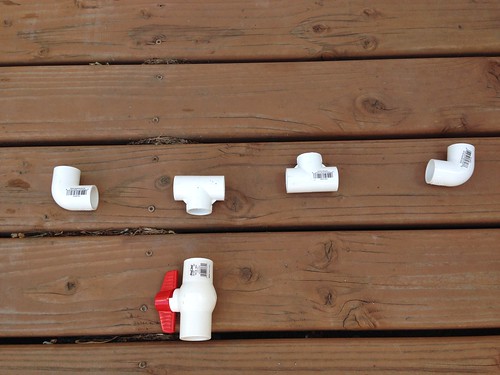
In addition to the threaded elbows, I also got the bits and pieces for the manifold system that will link all three barrels together. They will obviously be connected with lengths of straight pipe. This whole system is 3/4 inch Schedule 40 PVC.
I didn't construct the manifold yet at this point, because I needed to get the barrels in place to determine the pipe lengths.
The next step was to construct a platform for the barrels. Each barrel will get a base of four cinder blocks. I bought the blocks last weekend, then the project stalled again for a week.
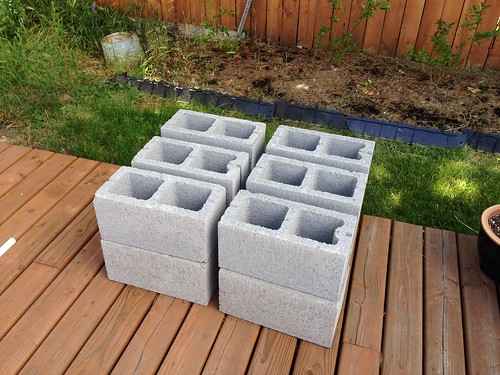
The reason for the stall was that I was dreading clearing and leveling the space. This is my west side yard, just off the back deck. It's been really hot and I didn't want to muck around with digging out a forest of cocklebur bushes and hefting cinder blocks around. Excuses excuses.

I had built this task up in my mind into something much worse than it ended up being. Once I went out and, you know, actually LOOKED at the space again, I decided it wasn't so bad. I really wanted to get the barrels installed.
So today I tackled it. It was 106° F (41° C) this afternoon, and I was literally dripping with sweat, but by golly, I got it done.
I chopped and dug the cockleburs (there were only two, but the roots went down a good two and a half feet), raked and pulled the rest of the weeds, and leveled the ground. I raked gravel over the area. I pounded the gravel firm with a maul and a board. I went and stood in the sprinkler for a while.
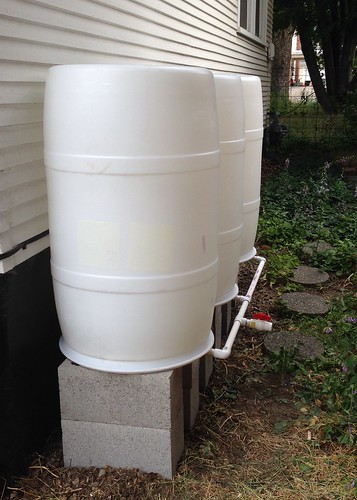
I set up the cinder blocks and leveled them (with some adjustment of the gravel base). I put the barrels on the blocks and measured for the pieces of the manifold. I cut the pipe for the manifold and dry-fit everything together. It all worked, so I took it all apart and put it back together with PVC primer and cement. I stood back and admired my handiwork.
Then I went and stood in the sprinkler for a while again.
So now I had three upside-down barrels linked together, with an outlet on the bottom, but no way to get water into them.
For that I needed a downspout diverter.
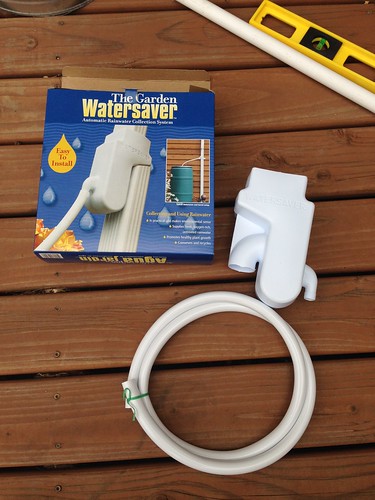
This fits into the existing downspout, and diverts water into the barrels until the barrels are full, then the hose fills up and the water overflows back to the downspout. Pretty spiffy.
Installing this required cutting into the downspout, notching the lower section, and setting the gizmo in the gap. Then a hose connects the diverter to the barrel, via a hole I drilled in what was originally the bottom, but is now the top.
That pretty much finished the system, but since these are sealed barrels, there has to be some way for the air to escape as they fill with water. To solve that, I drilled a small hole in the top of each of the barrels, ran a length of aquarium air line tubing from that hole up along side the downspout, and sealed around the hole/tubing with caulk. As long as the top of the airline tubing is above the level of the diverter, it's still in effect a sealed system as far as the diverter knows, and the diversion function remains effective.
And voila!
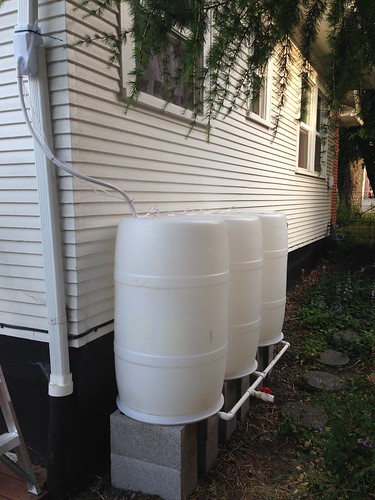
My finished 165-gallon rain collection system! I'm quite ridiculously proud of myself.
3 comments:
You should be ridiculously proud of yourself! That is quite the set up. I've been thinking I need to divert one my downspouts here, and you've inspired me..... I think I'll wait until it cools off a bit. :-)
I agree -- you have a right to be proud. Looks great! Although what I wonder with those is just how far 165 gallons of water will go in the La Grande climate. You'll have to let me know if this ends up helping with the water needs.
That's a really cool configuration for the water tanks. You certainly know how to deal with them. These water tanks are such a relief, as they help solve a lot of potential problems in our homes. But they should also be set up properly in the house, and the tips that you have provided will be very useful to a lot of homeowners everywhere.
Bert Aguilar @ Rainfill Tanks
Post a Comment