Tuesday, August 30, 2016

Suddenly... a quilt.

Well.  That was unexpected.

Emma and I went on our annual back-to-school thrift store jaunt to Tri-Cities this past weekend for school clothes, and (as always) found ourselves in the craft store as well.  I was just browsing around and for some reason ended up in the fabric section.  I had no particular plan in mind, but when I was confronted with a rack of packages of pre-cut quilt fabrics on a screaming deal sale, I was suddenly seized by a violent desire to make a quilt.  Immediately.

Emma picked out green and white.

precuts for Emma's jelly roll race quilt (2 of each)

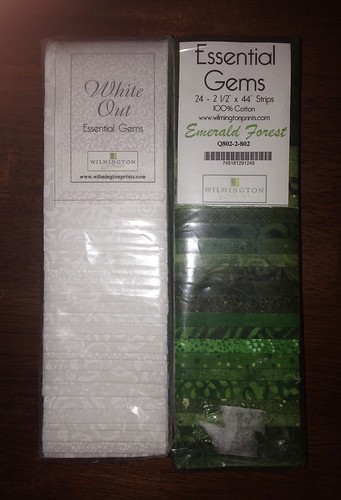
These packages are a highly convenient, if somewhat pricey, way to start a quilt.  Each package contains 24 strips measuring 2.5" x ~40".  Precut and ready to sew!  Getting them on sale was perfect, because normally each package is about $25 and that's too spendy for me.

I've never worked with these before, so I decided to keep it simple and just do a basic jelly roll race pattern.  A "jelly roll" is what the precut strips are called when 40 strips are packaged in a round wheel, and the jelly roll race quilt is a popular easy pattern using these pre-cuts. For Emma's quilt, I used a total of 96 strips (48 green, 48 white).  This will give a quilt top that's approximately 80" x 96" (queen sized), oversized for Emma's full-size bed but nice and snuggly.

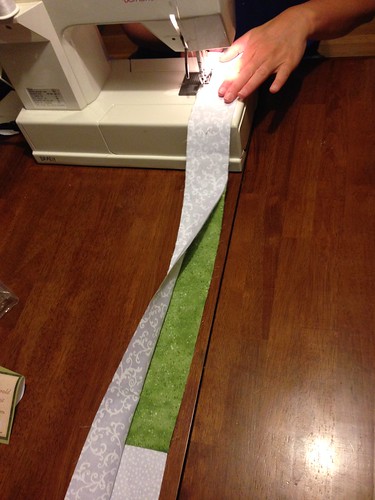
You start by sewing all the strips for each section together end to end, into a gigantic long strip.  I alternated green and white strips when I assembled the initial long strip for each section.

sewing the strips together for Emma's jelly roll race quilt

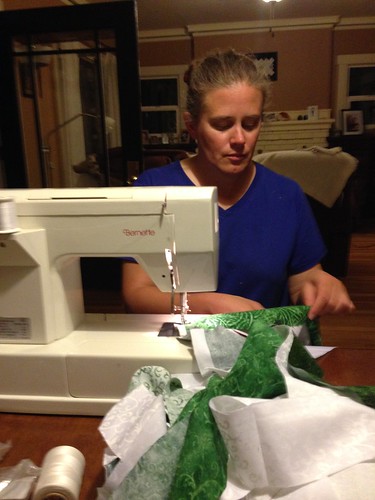
Once the strips for each section are attached, you whack off 18" from one end so that the seams don't line up when you fold it in half, then match up the two ends and sew a long seam down one edge, thereby halving the length and doubling the width.  This first seam is very, very, very, very long. You end up with a piece that is two strips wide.

first doubling of Emma's jelly roll race quilt

Then you fold and sew the long edge again four more times, until you have a piece that is 32 strips wide.  Because of geometry and the laws of doubling, Emma's quilt had to be made in two pieces, with the second one half the size of the first (16 strips wide).  So I made the two pieces, sewed them to each other, and hey presto- a quilt top!

Emma's jelly roll race quilt

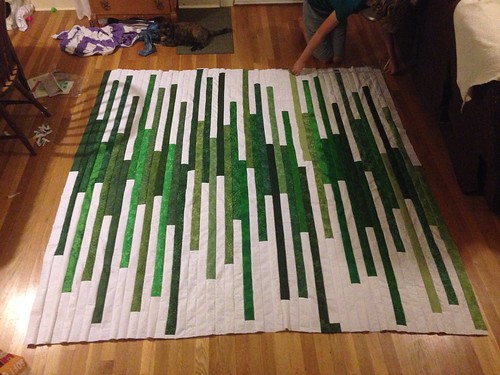
How fun is that?! I actually like the randomness that happens with the folding and doubling, though that one spot where the green breaks is a little jarring to me.  Emma says she likes that spot best- it's the path through the hedge.  Go figure.  There's really no good way to predict or arrange the colors without making yourself crazy; you have to let go and embrace the serendipity.

This was a really easy project that only took an evening and a half.  I can't wait to finish it off with the backing and batting, so I can make MY quilt.  Because... ahem... of course I couldn't stop at just one when the fabric was on sale...

Wednesday, August 10, 2016

I spy...

An unexpected mid-summer amaryllis scape!

Red Lion amaryllis, unexpected summer scape

I noticed this scape peeking out of one of my amaryllis bulbs this afternoon.  This is the 2008 Red Lion bulb, which has bloomed faithfully every year. It didn't bloom last winter and I thought it was going to skip a year, but apparently the summer outside kicked it back into gear.  It has lots of leaves, so hopefully it will store up plenty of energy and be able to put on its usual show inside next winter too.

Tuesday, August 09, 2016

Disaster and mayhem at the Tomato Annex

O.   M.   G.

WHAAAARRRRGARBLNABBIT!

tomato disaster

This is not a picture of the Tomato Annex from May.  This is a picture from today, August 9, 2016.

My tomatoes have had a really rough time this year.  It was so cold this spring, and has continued to be cool at night all summer (last night, IN AUGUST, it was 39 degrees at my house), and the tomatoes have struggled.  The past couple weeks, we finally had a stretch of really warm weather with daytime temps in the 80s and 90s, and they started to take off despite the cool nights.  They had grown to over three feet tall, and were covered with flowers and itty bitty fruit. I was excited.

Last night, there were apparently demonic evil deer in the Tomato Annex yard.

tomato disaster

Sob.

Friday, August 05, 2016

Blooming sea urchin

My little sea urchin cactus (Astrophytum asterias) bloomed today!  First thing this morning, it looked like this

Astrophytum asterias almost blooming

Then at noon it was open!

Astrophytum asterias

It's so pretty.

Astrophytum asterias

I like the feathery edges on the petals and sepals.

Astrophytum asterias

And bonus- it's fragrant!  It smells sort of lemony, but sweet.

Astrophytum asterias

Thursday, August 04, 2016

TWO spikes now!

I noticed yesterday that the Gastrochilus somai orchid is putting out a second spike!

Gastrochilus somai with TWO spikes!

Go plant go!

Wednesday, August 03, 2016

Fair 2016

Hello hello!  The Fair started today!

I entered a few things this year, since I finally finished off some mostly-finished pieces that have been hanging around mocking me.

First up is the blue hardanger square-in-square piece that I designed last year.  I mounted it into a box lid, and it won a blue ribbon and Best of Show!  Yay hooray!!

hardanger box lid

Next up are the three snowflakes (actually two snowflakes and one eight-sided motif) that I made when I was experimenting with tatting finer threads.  The top and bottom ones are made with #40 thread, and the middle is my own design, made with #100 thread.  I wanted to put all three in the fair but you can only enter one item per class and lot, so I joined them together, put a hanging loop on, and called it a Christmas ornament.

tatted snowflakes

Last up is the green and white edging that I made last year shortly after I re-taught myself to tat.  This has also been sitting in the drawer, just needing the fabric insertion added. So yesterday, at 4:30 pm, I pulled out the sewing machine and an old ripped pillowcase and finished it off.  Fair entries were due by 8:00 pm, but I thought I probably had enough time.  Because I'm not a procrastinator or anything, nope not me.

I traced a circle with a fortuitously-sized drinking glass, ran a narrow line of very close zigzag stitches around the circle with the machine, then hand-sewed satin stitches over that line, catching the inner picots of the tatted edging as I went.

I like the way it came out. This is pretty much exactly as I was envisioning it as I tatted.  The circle isn't perfect and I'll probably clean up that one point on the curve next week when I get it back from the fair, but I really like it.

tatted doily

The thread was my grandmother's, vintage #80 Star tatting thread that's probably 50+ years old. The pillowcase was my mother's, a really old pillowcase that I slept on as a child.  When I went to off to college in 1989 this was one of the two pillowcases that she sent with me, and I continued using it until about four years ago, when it ripped down the middle.  Throw it out?  I think not.  The cotton is so soft and worn and sun-bleached white that it's nearly transparent, and I knew I would eventually use it for something.

Grandma's thread, Mom's fabric, my tatted design.  Everything about this little doily makes me smile.